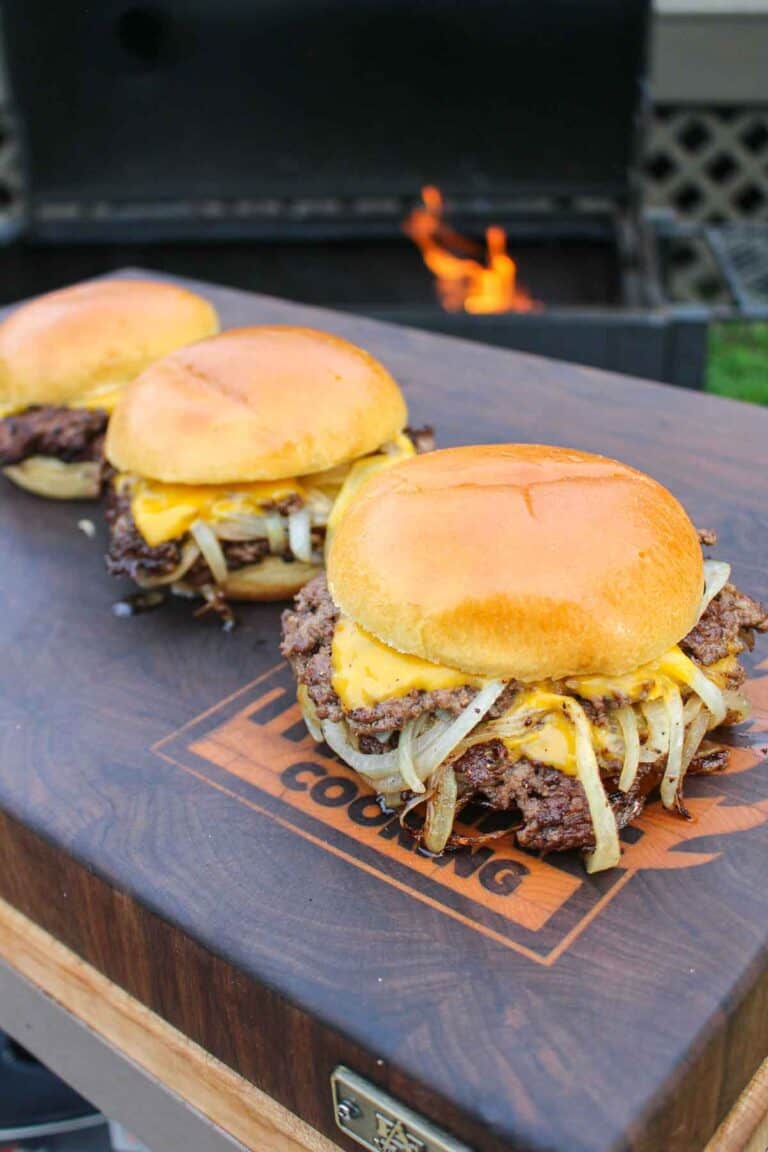
Oklahoma Onion Burger

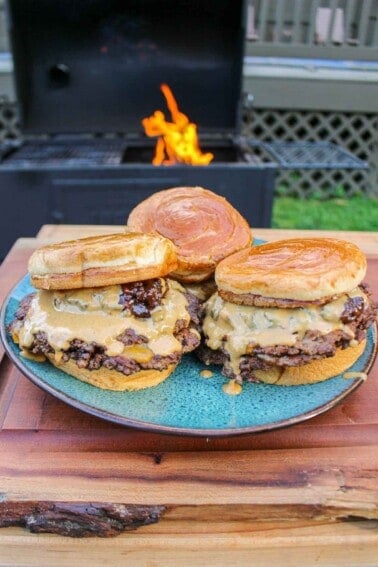
Oklahoma Onion Burgers are ready to eat.

The Oklahoma Onion Burger is a classic all-American recipe. During the hard times of the Great Depression, when jobs were…

The post Oklahoma Onion Burger appeared first on Over The Fire Cooking.

Oklahoma Onion Burgers are ready to eat.

The Oklahoma Onion Burger is a classic all-American recipe. During the hard times of the Great Depression, when jobs were scarce, locals in El Reno, Oklahoma had a bright idea. Onions were plentiful and cheap, but meat? Well, that was a different story. So, they figured, why not pile on the onions and skimp a little on the meat? Fast forward, this humble burger recipe is now a national treasure.

post sponsored by Oklahoma Joe’s
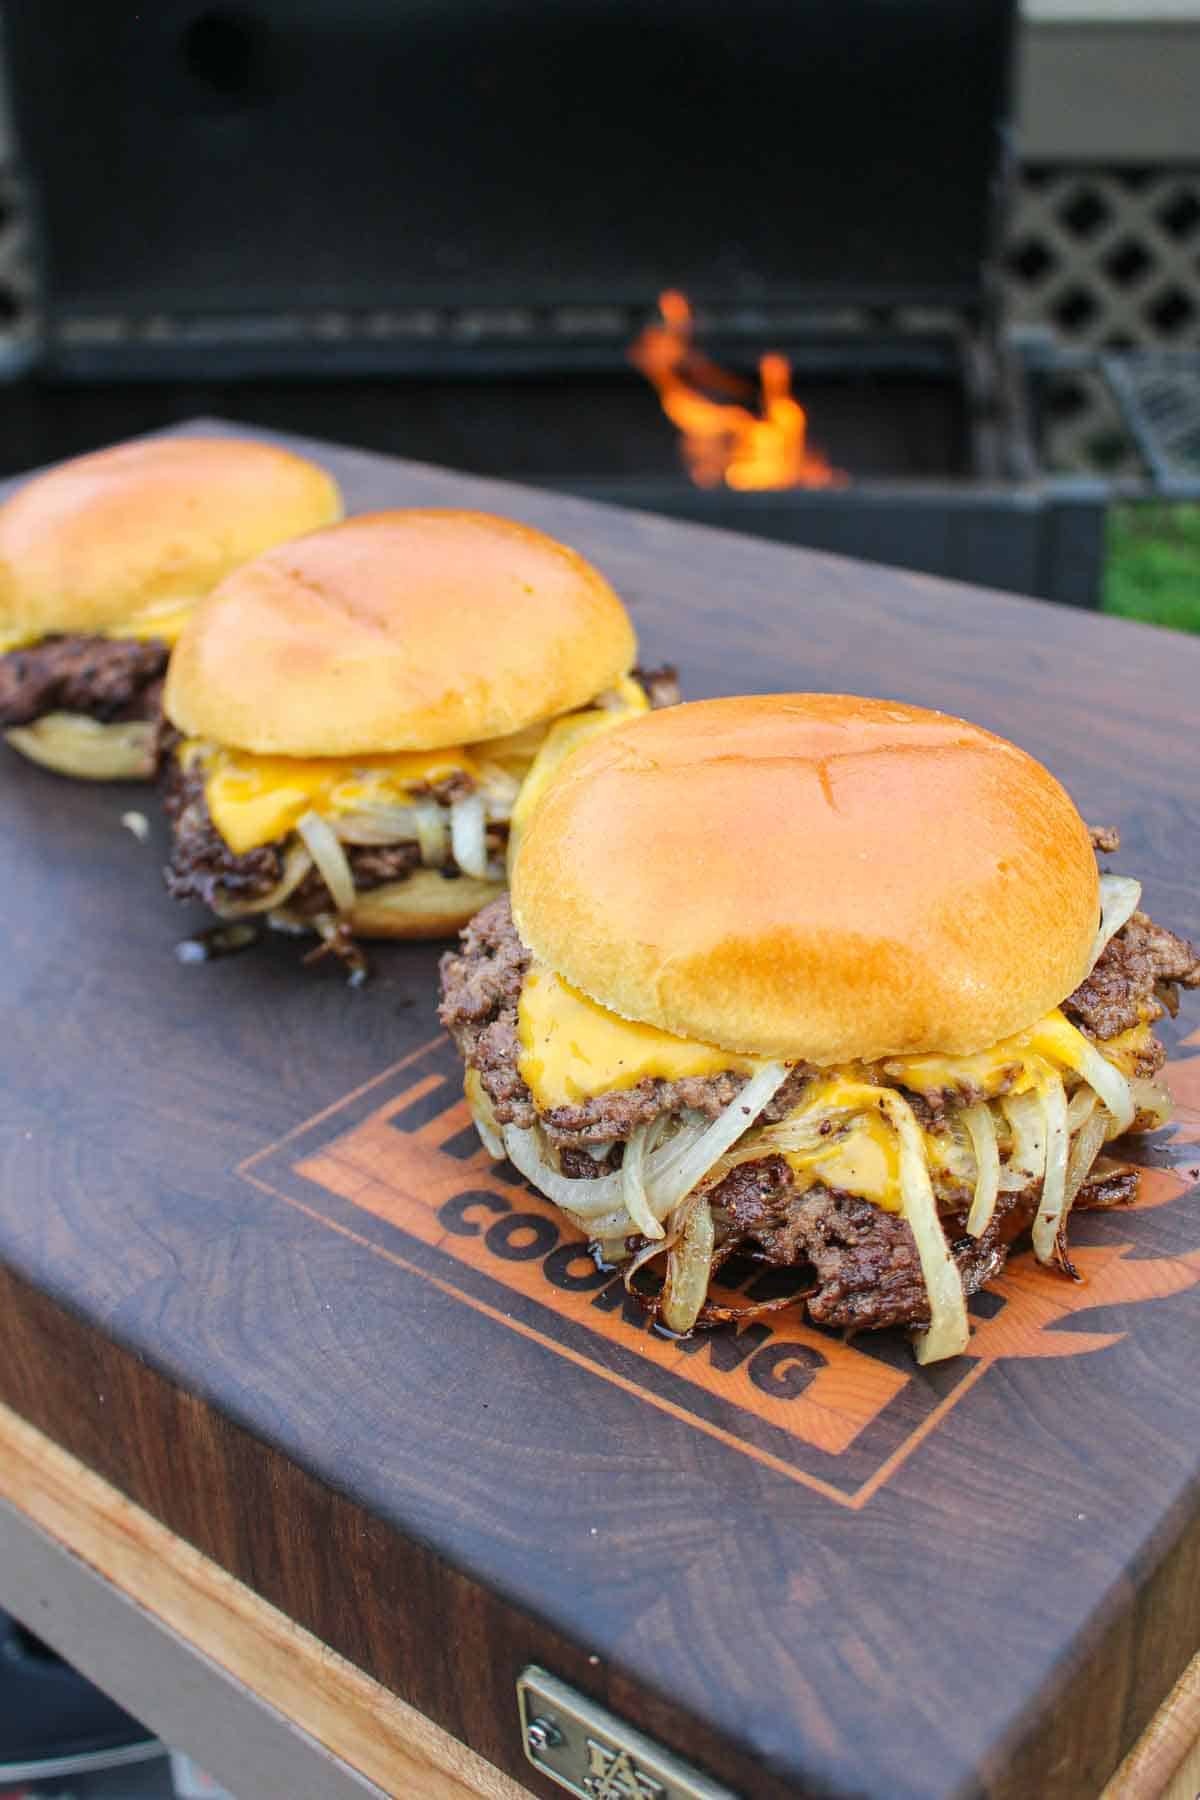
Oklahoma Onion Burger ready to eat.

While the days of five-cent burgers are long gone, this Dust Bowl-era depression burger is now one of my favorite comfort foods. On any day or night of the week, a thin, crispy, and juicy burger patty topped with melted cheese and lots of caramelized onions always warms my soul!

Before breaking down how to make the best onion burgers, a quick shout out to Oklahoma Joe’s Judge Charcoal Grill. This is my go-to rig for making all kinds of magic happen in my backyard. I love this grill. It’s built like a tank. And the size? It’s freakin’ huge! You can grill, smoke, and sear all at once.

Plus, it’s got adjustable dampers that let you dial in the perfect temperature. Oh, and did I mention it’s got handy extras like a built-in temperature gauge and storage shelves? It’s basically a backyard BBQ lover’s dream come true, which is why I can’t stop talking about it!

Why You’ll Love the Oklahoma-Style Onion Burgers

I love this smashed onion burger recipe because it’s more than just a burger. It honors the past. Every tasty mouthwatering bite reminds us of the power of simple food made well. I’ll never know what it was like to endure the Depression, but the sound of sizzling beef with onion vapors filling the air is a comfort that cannot be underestimated.

  • Hamburger Patties – For the ground beef, I’d go with 15 percent beef fat for the tastiest and juiciest patties. 
  • White Onions – You’ll need lots of onions for this recipe. You can also use yellow onions. 
  • Hamburger Seasoning – Seasoned meat is just the start of what makes this burger so freakin’ delicious. Don’t skip the kosher salt, black pepper, and garlic powder.  
  • Condiments – Each burger gets a slice of American cheese. You can add some sliced dill pickles directly to the burger or serve them on the side.
  • Hamburger Buns – Brioche burger buns are the perfect complement to seasoned beef and sweet caramelized onions. However, feel free to use your favorite buns.
  • Special Burger Sauce (Optional) – This tasty sauce is easy to make with your favorite mayo, ketchup, relish, white vinegar, and sugar. 

For another fun take on beef and onions, check out this Flying Dutchman Smashburger, where the onions take the place of the buns! I’ve even made Burger-Stuffed Onion Rings… So this combo is really proving to be an obsession of mine.
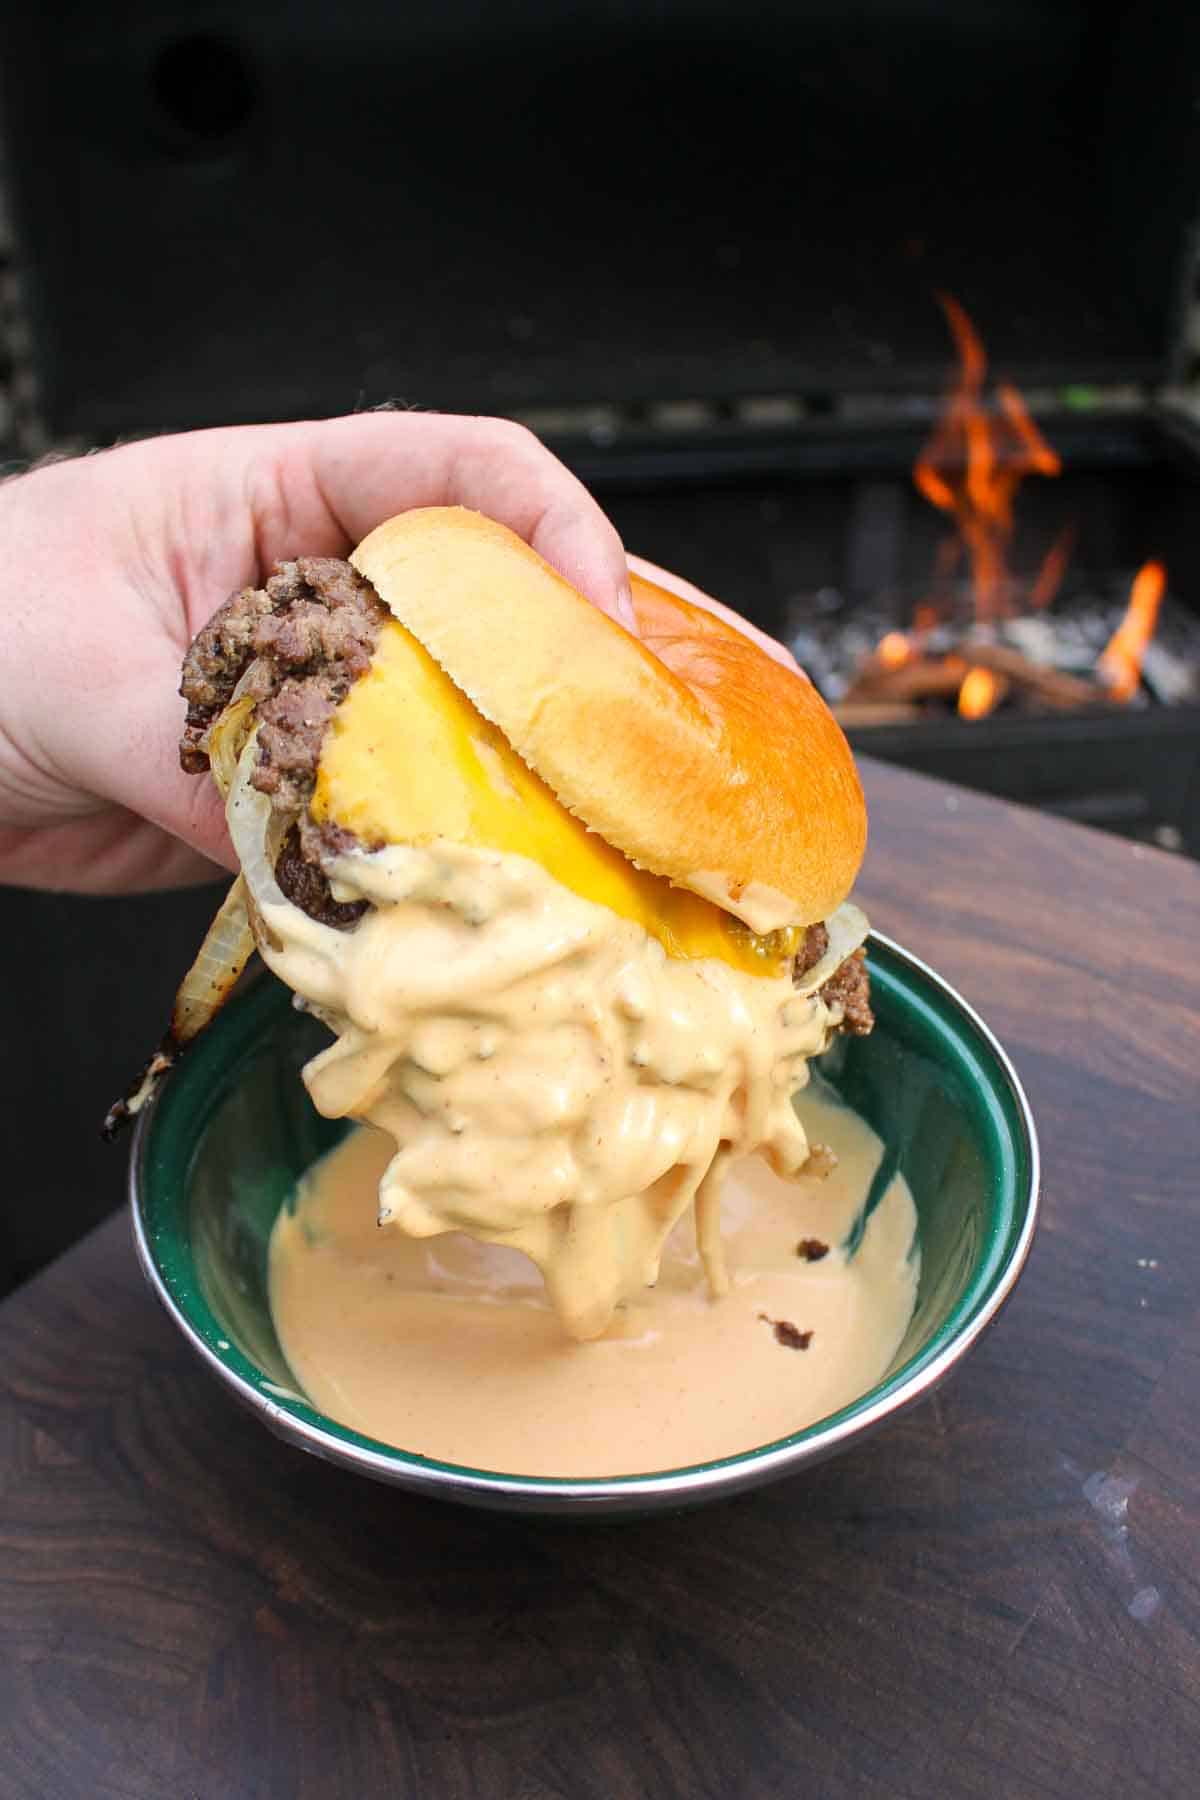
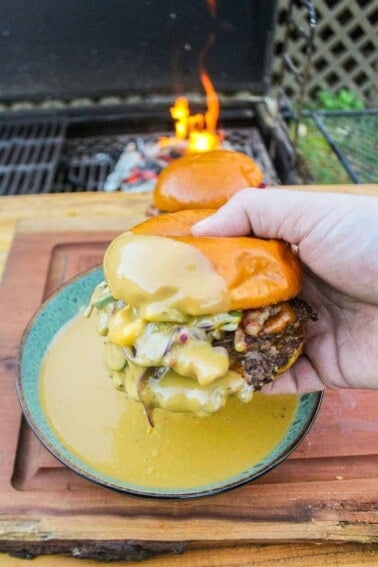
The onion burger is dipped in special sauce.

It’s amazing how the most delicious recipes, come together with simple ingredients. You’ll be amazed at how good these burgers taste, especially when dipped in that special sauce!

Pro Tip: Add the onions after the smash!

While some smash burger recipes might instruct you to smash the hamburger meat directly onto the caramelized onions, like my Cheesy Onion Smash Burgers and Oklahoma Onion Patty Melt, this recipe respectfully differs. Adding the onions after the smash delivers a crispy beef patty that is so freakin’ delicious! 

If you love the combo of beef and onions, check out these OTFC recipes: Patty Melt with French Onion Au Jus, Steak Onion Skewers, and Grilled Steak with Cheese Stuffed Onions.

How to Make the Best Onion Burgers 

Prep Time

Alright, let’s get grilling, sizzling, and smashing! First things first, start by making the special sauce recipe. You’ll want to mix all the ingredients in a small bowl or Pyrex measuring cup. Place in the fridge until it’s time to slather it on each Oklahoma Onion Burger. Chili cheese is another good dipping option, if that’s something you’d be more interested in.

Now, onward to the hot griddle. Fire up your Oklahoma Joe’s Judge Charcoal Grill, aiming for a super high heat temperature of around 450° degrees F for direct cooking. 

Grab your ground beef and form beef into burger balls for each hamburger patty. You should end up with about 6-8 patties when using about 2 pounds of ground beef. 

Oklahoma Joe’s Grilling Time

Next, it’s time to make our beef patties from the prepped balls. If you’d like to switch it up, give this same recipe a go but with chorizo and make a chorizo smash burger, or add some seafood for some surf and turf action!

Now, add a cast iron skillet or large plancha to the preheated grill. Place a burger ball on the large skillet, cover it with parchment paper, and smash the top of the burger with a sturdy spatula. Season each single patty with salt, pepper, and garlic. Then, let it sizzle for about a minute and a half. 
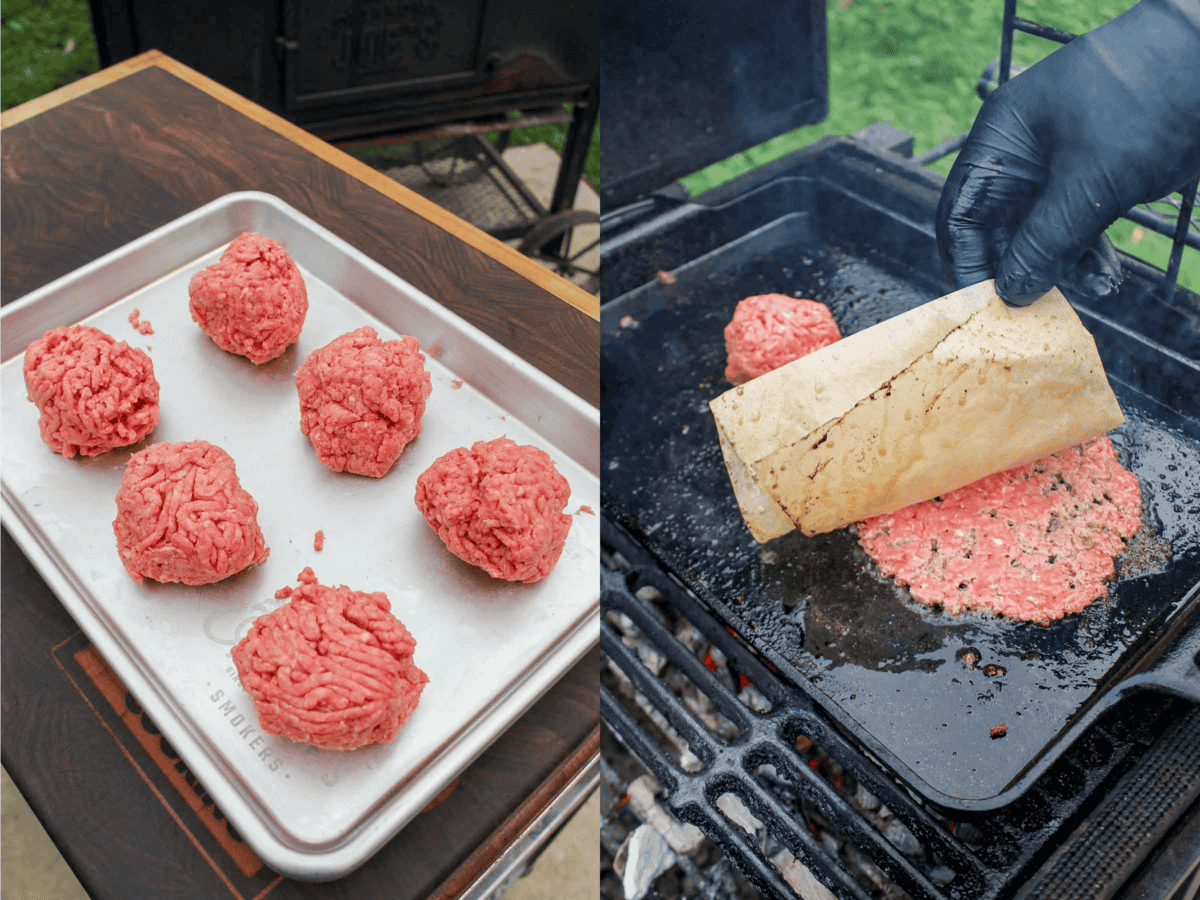
The beef patties are formed into balls, then smashed.

Before flipping, add your sliced onions on top of the patty, then carefully, without smashing, turn the patty over and season the second side. Slap a slice of cheese on top and let it melt into gooey goodness for another minute or two.
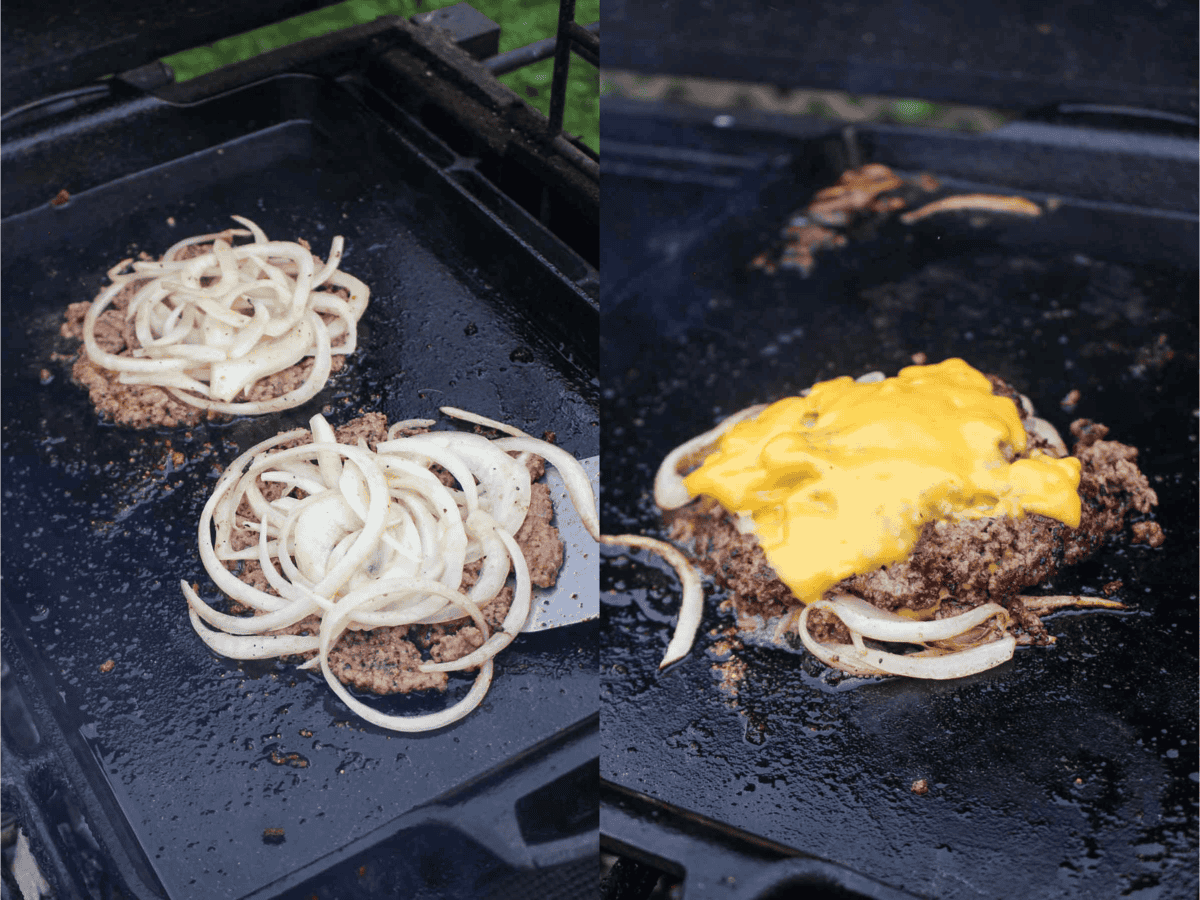
The onions go on the smashed burger before flipping.

While that cheese is melting, warm up your buns on the grill. Place the top of the bun on the melted cheese and then the bottom bun on top of the top bun. This might sound confusing, but all it’s doing is allowing the buns to warm and become soft. Placing the bottom bun on top of the top bun while on the grill allows the bottom bun to warm but also prevents it from becoming too soft.

Once everything’s nice and melty, pull off your burger and let it rest. Repeat the process for the rest of your patties.

Assembly Time

Now comes the best part: putting it all together! Stack those juicy patties on your warmed buns, slather on that special sauce, toss on some pickles, and get ready to devour the best burgers ever made using the epic smash technique! 
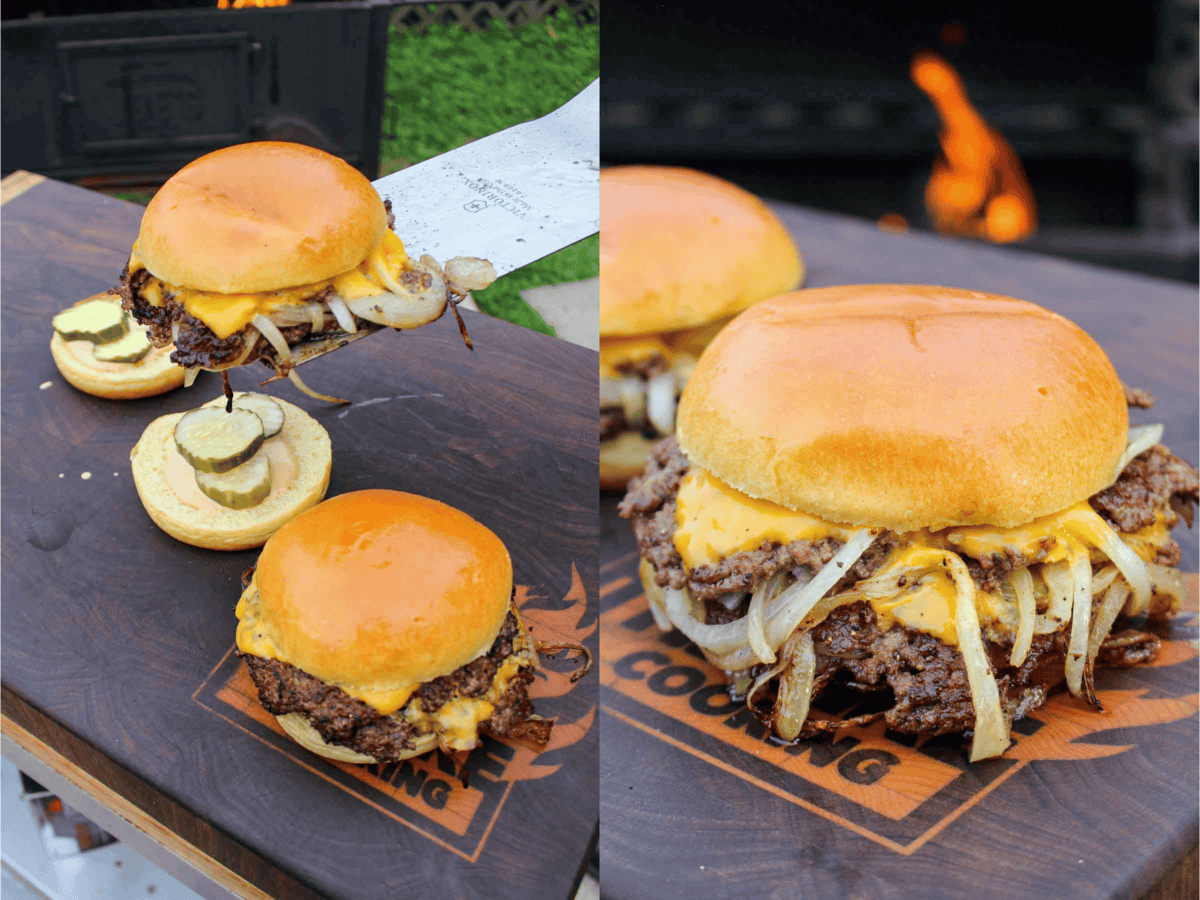
The smash burgers are assembled.

What to Serve with the Oklahoma Onion Burger 

You can’t go wrong with a side of some crispy golden brown fries with some spicy ketchup for dipping. If you’re feeling up for something a little extra, sweet potato fries or tater tots would work too. If you want to double down on the onion theme, grab some frozen onion rings and heat them up in your air fryer while the burgers are cooking. 

What to do with Leftovers & Reheating

Wrap the cooled-down patties tightly in foil and keep them in an airtight container in the fridge for 3-5 days. When it’s time for seconds, make more caramelized onions and then heat the patties on the plancha again, adding more cheese, as needed.

More on Smash Burgers

FAQs for the Oklahoma Onion Burger

Where is the home of the Onion Burger? 

The original home of the Onion Burger is El Reno, Oklahoma. If you find yourself in The Sooner State, Sid’s Diner, which opened in 1989, is now famous for making the iconic burger.

​What’s the taste difference between white onions and yellow onions?

White onions tend to have a milder taste with a slightly sweeter flavor profile, especially when caramelized. Yellow onions have a more robust and pronounced sharp “oniony” flavor. 

What’s the best way to avoid crying while slicing onions? 

I’ve tried all the tricks, including refrigerating the sweet onions for 30 minutes before slicing, cutting them under running water, and wearing goggles, but, ultimately, I power through it and cry if I want to!
Get stoked for life

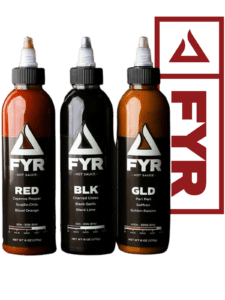
This sauce is FYR!

an all-new line created for live fire cooking

Born from a deep passion for food and flavor. Whether you’re grilling in the backyard or live fire cooking around the world, we have what you need to transform every meal into an adventure.
Oklahoma Onion Burger with special sauce.
Print

Oklahoma Onion Burger

This classic burger recipe celebrates Oklahoma in a big way with the Oklahoma Onion Burger made with an Oklahoma Joe's Grill!
Course Dinner, Lunch
Cuisine American
Prep Time 15 minutes
Cook Time 15 minutes
Total Time 30 minutes
Servings 4 people
Calories 578kcal
Author Derek Wolf

Ingredients

Beef

  • 1-2 lbs Ground Beef 85/15
  • 2 cups White Onions sliced
  • 1.5 tbsp Kosher Salt
  • 1.5 tbsp Black Pepper
  • 1.5 tbsp Garlic Powder

Special Sauce (Optional)

  • ½ cup Mayonnaise
  • ½ cup Ketchup
  • 2.5 tbsp Relish
  • 2 tbsp White Vinegar
  • 1 tbsp White Sugar

Burger

  • Brioche Burger Buns
  • Sliced American Cheese
  • Dill Pickles chips

Instructions

  • In a bowl, mix all the ingredients for the special sauce then place in the fridge until ready to use.
  • Heat your Oklahoma Joe’s Judge Charcoal Grill high heat (around 450F) for direct cooking.
  • Grab a handful of ground beef (around 1/4 lbs… ish) and gently roll it into a ball. Repeat this for 6-8 balls or until you’re out of meat.
  • Add a cast iron skillet or plancha over the flames to heat until it's slightly smoking (about 450 on the skillet).
  • Add a burger ball to the skillet. Place a piece of parchment over one ball and then firmly press with the spatula until the burger is “smashed” on the skillet.
  • Season the patty with salt, pepper, and garlic. Let cook for another 1-1.5 minutes.
  • Before flipping, top with a handful of sliced onions on the unflipped patty. Carefully flip the burger patty over and then season the new side.
  • Top with a slice of cheese and let melt for 1-2 minutes.
  • Top each burger with the ton bun on the cheese and the bottom bun on the top bun. Helps to warm up the buns!
  • Once the cheese has melted, pull off and rest. Repeat for the rest of your patties.
  • Build your burger with the special sauce, pickles and 1-2 burger patties. Serve and enjoy!

Notes

Pro Tip: Add the onions after the smash!
While some smash burger recipes might instruct you to smash the hamburger meat directly onto the caramelized onions, my recipe respectfully differs. Adding the onions after the smash delivers a crispy beef patty that is so freakin’ delicious! 

Nutrition

Calories: 578kcal | Carbohydrates: 25g | Protein: 22g | Fat: 44g | Saturated Fat: 12g | Polyunsaturated Fat: 13g | Monounsaturated Fat: 15g | Trans Fat: 1g | Cholesterol: 92mg | Sodium: 3250mg | Potassium: 587mg | Fiber: 2g | Sugar: 13g | Vitamin A: 202IU | Vitamin C: 7mg | Calcium: 60mg | Iron: 3mg

The post Oklahoma Onion Burger appeared first on Over The Fire Cooking.
The Best Steak Pinwheels Recipes

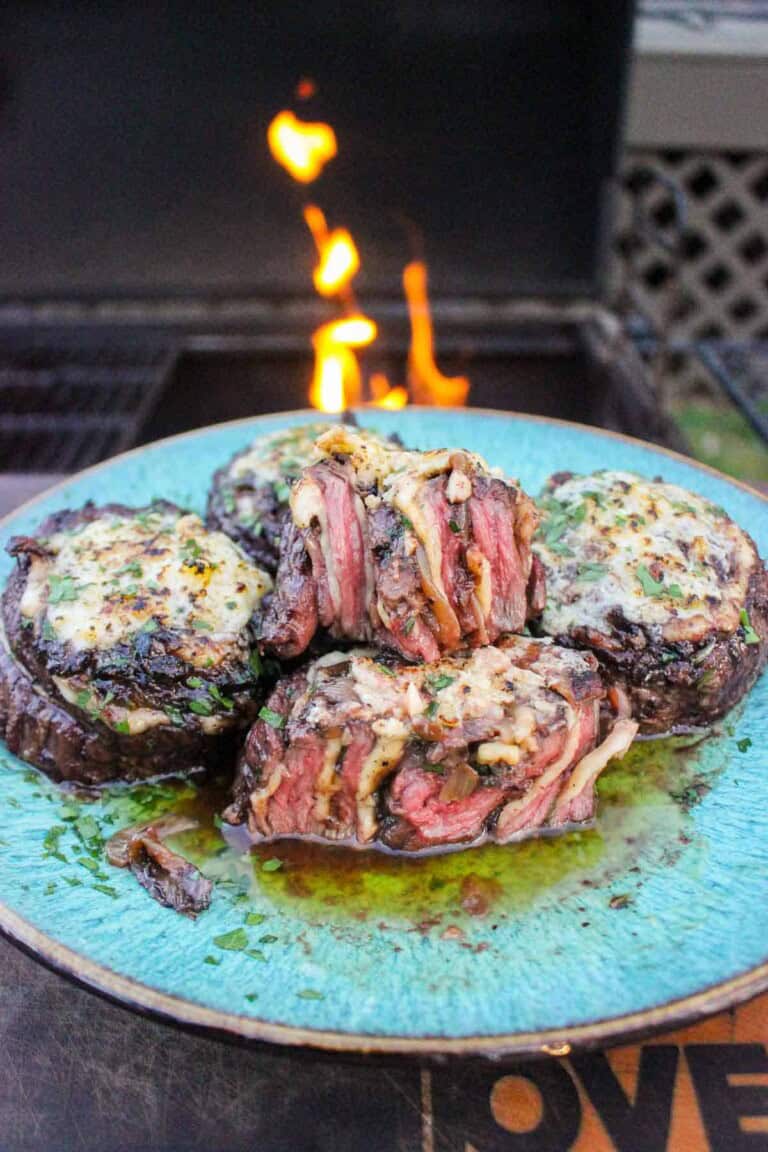
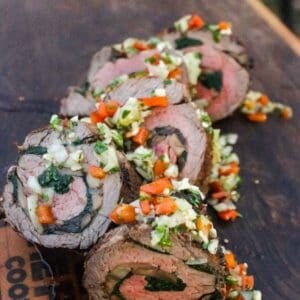
French onion steak pinwheels, plated.

Here it is: the best steak pinwheels recipes roundup! I’m a huge fan of steak pinwheels because they’re really impressive,…

The post The Best Steak Pinwheels Recipes appeared first on Over The Fire Cooking.
French onion steak pinwheels, plated.

Here it is: the best steak pinwheels recipes roundup! I’m a huge fan of steak pinwheels because they’re really impressive, so freakin’ delicious and don’t take a lot of work in the kitchen. Because of their beautiful presentation and how easy they are to make, grilled steak pinwheels recipes are a huge hit everywhere. You can make them for your next backyard BBQ with friends or a special occasion like holiday parties. 

Fajita steak pinwheels, grilled and ready to eat.

Steak pinwheels may look intimidating, but I’ll give you all the tips and tricks you need to make these beef pinwheels with confidence and style. You’ll also have a solid list of delicious recipe after delicious recipe to choose from!

Why You’ll Love Steak Pinwheels

Once you start making steak pinwheels, you won’t be able to stop. They hit all the flavor profiles thanks to the cheese, vegetables and other pieces we can roll in, and the sauces we can put on top of the steak rolls. Because of these endless variations, the sky’s the limit. I can walk into the grocery store and see what looks good, then turn it into a freakin’ delicious steak pinwheels recipe. 

Spanish garlic steak pinwheels, served and ready to eat.

The key is having the right step-by-step instructions to get you started, so next time — and every time you hit the grill after — you’ll be rolling steak pinwheels like a pro. 

For more pinwheel style recipes, check out my Pork Belly Cinnamon Rolls and Steak Frites With Garlic Chili Butter. They’re still meat rolled into a spiral, but not the classic “pinwheel” that we refer to in this round up. There’s also this Tomahawk Beef Short Ribs recipe, where we roll the short rib on top of itself to look something like a hatchet. Pretty cool, and even tastier!

How to Cook the Best Steak Pinwheels

​Pinwheel Prep Basics

  • Choosing your cut: I like to make steak pinwheels with long, flat steaks that are easy to pound thin and roll. Skirt steak is my favorite, but you can use butterflied flank steak too (see Steak Milanesa Napolitana for another butterflied flank steak recipe). 
  • Flattening the steak: If you’re having a rough day, here’s a great way to take out all your anger. Put your steaks on a cutting board, use a very sharp knife to slice them in half, and cover with parchment paper or a sheet of plastic wrap. Using a heavy mallet or specific meat mallet, hammer the steak until it is less than 1/2 inch thick. The thinner you can make the steak, the easier it will roll and the better your separate pinwheels will stay together. 
  • Seasoning the steak: Once you’ve got your butterflied steak nice and thin, you’ll want to season both sides of the steak according to your steak pinwheels recipes with vegetable oil or beef tallow and your seasoning of choice, like kosher salt or one of my Spiceology rubs, which you can find in our shop. Then, you can add in your fillings. Slices of provolone cheese or mozzarella cheese, bell peppers or fresh spinach, and chorizo are all great options. Finally, you’ll secure the individual pinwheels with butcher’s twine so they hold up on the grill. 
Preparing and rolling steak fajita pinwheels.

Add flavor to everything you’re cooking

shop over the fire spice lines

Grilling Steak Pinwheels

  • Searing: I’m a fan of a two-layer fire for grilled steak pinwheels. First, we’ll sear the pinwheels on the hot side of the grill, about one minute of cooking time per side. That’s how we get a nice crust on these steak roll ups. 
  • Finishing: Once we’ve got that nice crust, I’ll move the pinwheels to the cool side of the grill to cook at medium heat for another 10-15 minutes, until they reach 125 degrees Fahrenheit internal temperature. Your meat thermometer is your friend here.
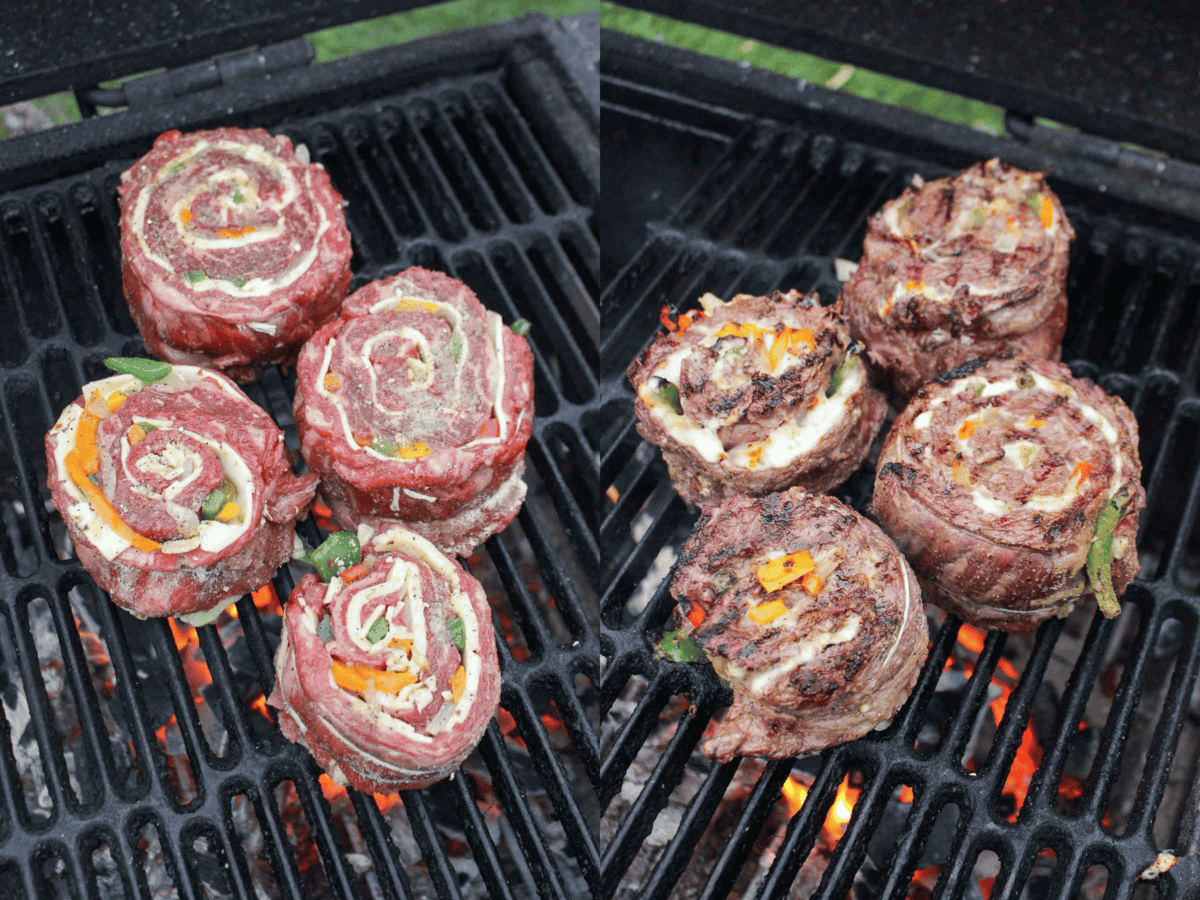
Grilling the fajita steak pinwheels.

Serving Steak Pinwheels

  • Resting: I say it all the time: let your steak rest! About 10 minutes after you pull them off the grill is best. When the meat rests, the muscle fibers have time to relax and the juices can redistribute throughout the red meat. 
  • Toppings: You can go as big as grilled shrimp or as simple as balsamic glaze or a little lemon juice, black pepper and kosher salt. Whatever you choose, it’ll be so freakin’ delicious. 
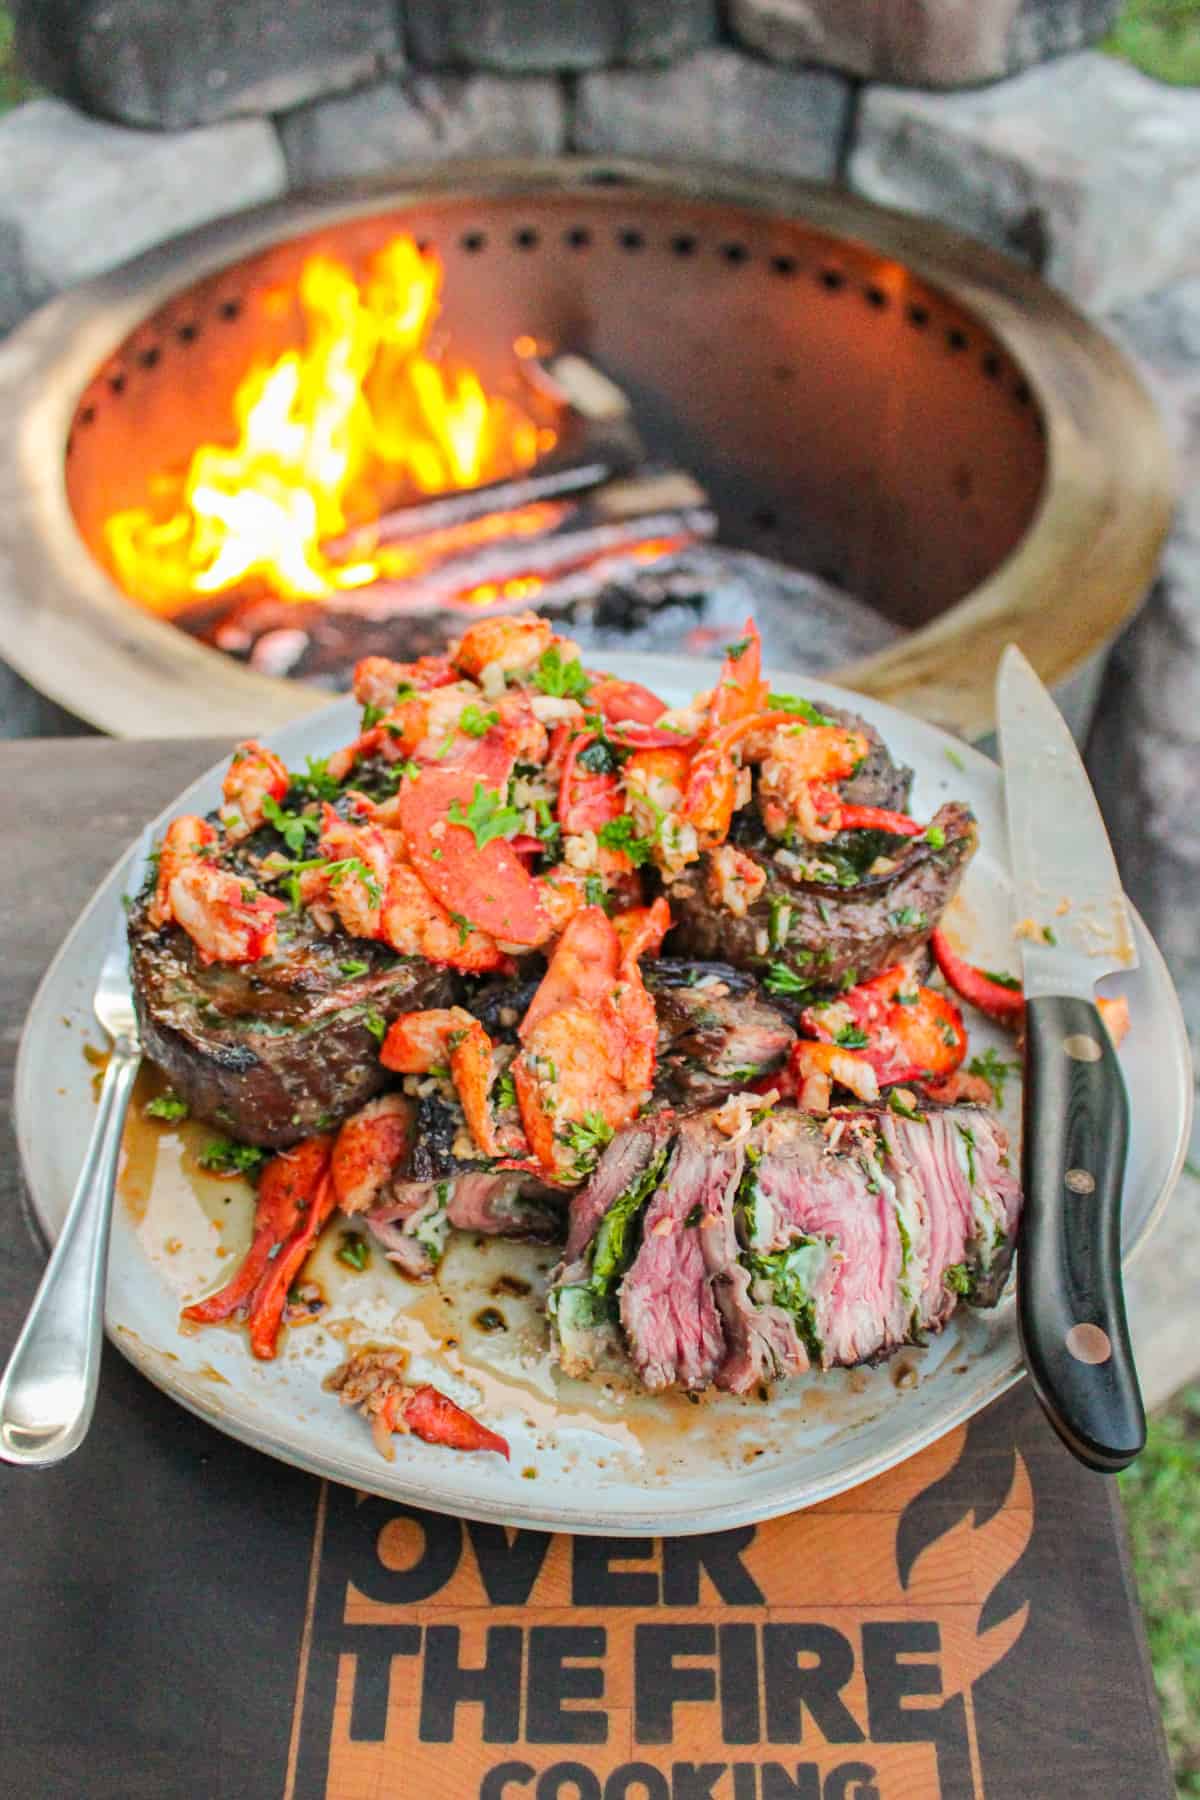
Surf and turf pinwheels with lobster.

My Favorite Grilled Steak Pinwheels Recipes

​Now that you’ve got the basics down, here’s the roundup of my favorite grilled steak pinwheels recipes! Be sure to let me know in the comments which ones you tried and liked the best. 

cheesy steak pinwheels

Cheesy Steak Pinwheels

As a child, I was always told not to play with my food. Little did they know that I would do that as an adult all the time! These Cheesy Steak Pinwheels are no exception to that rule.
View Recipe
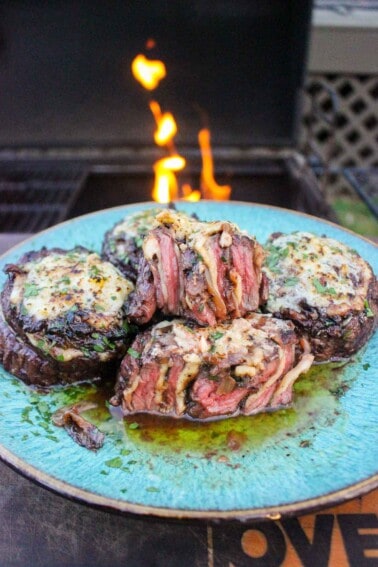
Spanish Garlic Steak Pinwheels on a plate.

Spanish Garlic Steak Pinwheels

Perfectly seasoned tender skirt steak, pounded thin, rolled with Spanish Manchego cheese, chorizo, and parsley is fun to grill and delicious to eat!
View Recipe
French Onion Steak Pinwheels sliced and ready to eat.

French Onion Steak Pinwheels

French Onion Steak Pinwheels for a steak rollup kind of dinner.
View Recipe
grilled steak pinwheel being lifted off of a cutting board with more pinwheels

Grilled Steak Pinwheels

These Grilled Steak Pinwheels are made with juicy steak layered with pesto, prosciutto, and provolone. Served with Charred Scallion Gremolata! 
View Recipe
Skirt Steak Pizza Pinwheels sliced and served.

Skirt Steak Pizza Pinwheels

Skirt Steak Pizza Pinwheels for a protein forward pizza!
View Recipe
A slice of Italian beef pinwheels.

Italian Beef Pinwheels

Italian Beef Pinwheels for a flavor packed steak with a bit of Italian flair.
View Recipe
flank steak fajita pinwheel

Fajita Pinwheel

This Fajita Pinwheel recipe is gonna have your taste buds spinning as soon as you dig in. Juicy, well-seasoned steak, gooey cheese, and tasty fajita veggies are an unbeatable combo!
View Recipe
Fajita steak pinwheels, grilled and ready to eat.

Fajita Steak Pinwheels

Fajita steak pinwheels are a fun, easy take on surf and turf that make for real crowd pleaser. The spicy butter is out of this world!
View Recipe
Final Surf and Turf Pinwheels

Surf and Turf Pinwheels

Rolled and stuffed skirt steak cooked all on the Breeo sear plate till perfect. Surf and Turf Pinwheels is the best of both worlds.
View Recipe
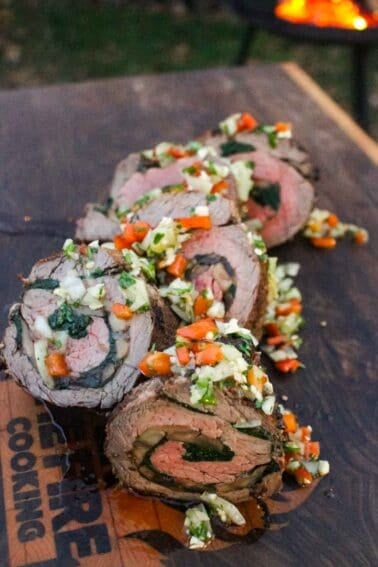
Stuffed Lomo Al Trapo is a twist on the classic dish from Colombia.

Stuffed Lomo Al Trapo

This savory creation, made with pounded whole beef tenderloin, seasoned mushrooms, and spinach, is truly a showstopper that belongs at any special occasion feast!
View Recipe
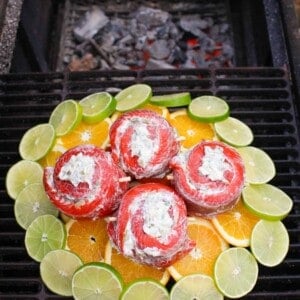
salmon pinwheels on a citrus plank overhead

Green Chili Salmon Pinwheels

These Green Chili Salmon Pinwheels are layered with green chili cream cheese, smoked with citrus fruit, and finished with agave nectar glaze.
View Recipe
Maple Cajun Salmon Pinwheels

Maple Cajun Salmon Pinwheels

Maple Cajun Salmon Pinwheels for a skillet full of deliciousness! What’s not to love about a cream cheese filling and maple syrup finishing glaze?
View Recipe

What to Serve with Grilled Steak Pinwheels

The great thing about steak pinwheels is they can really stand on their own. If you want to feel extra depending on the occasion, you can serve these flavor bombs with rice, roasted potatoes or crusty bread as a starch and a simple garden salad or green veggie. 

For More Skirt Steak

Leftovers and Reheating

For leftover steak pinwheels, wrap them up tightly in aluminum foil. Then, place them in an airtight container in the fridge for 3-4 days. When it’s time to reheat, open the aluminum foil and add a little beef tallow to keep the meat moist while warming over the grill or in a 250-degree oven for 10-12 minutes.

French onion steak pinwheels, plated.

FAQs

Where should I buy my steak? 

Your local grocery store is a great option, especially if you can get to know the butcher and ask questions! You can also buy some of the best pasture-raised beef you’ll ever taste online. White Oak PasturesUS Wellness Meats, and Primal Pastures are a few popular sites. If you have your own high-quality meat supplier, let me know in the comments. 

Since skirt steak has a lot of connective tissue, should I marinate the steak for my steak pinwheels recipes?

You won’t need to marinate the steaks here, since you’ll be pounding it and breaking down the fat with a meat mallet.

What spice rubs do you recommend for steak pinwheels? 

​It all depends on the other flavors you’ve got in the beef roll. You can use your favorite homemade rub, one you find at the store or one of my Spiceology rubs. I really love the Jalapeno Lime Pilsner for Tex-Mex dishes!

Get The Cookbooks!

Flavor X Fire & FOOD X Fire

By Derek Wolf

All the major tastes—salty, sour, sweet, bitter, and umami—are explored in depth, along with an investigation of other components you should consider when it comes to flavor, such as aroma, heat, and texture.

The post The Best Steak Pinwheels Recipes appeared first on Over The Fire Cooking.
Fajita Steak Pinwheels

Fajita steak pinwheels, grilled and ready to eat.

Steak pinwheels are so fun, easy and freakin’ delicious that I just can’t stop making them. There are so many…

The post Fajita Steak Pinwheels appeared first on Over The Fire Cooking.
Fajita steak pinwheels, grilled and ready to eat.

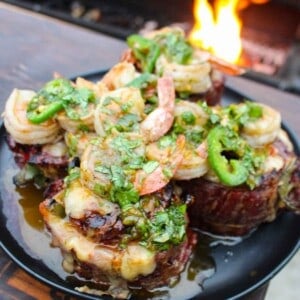
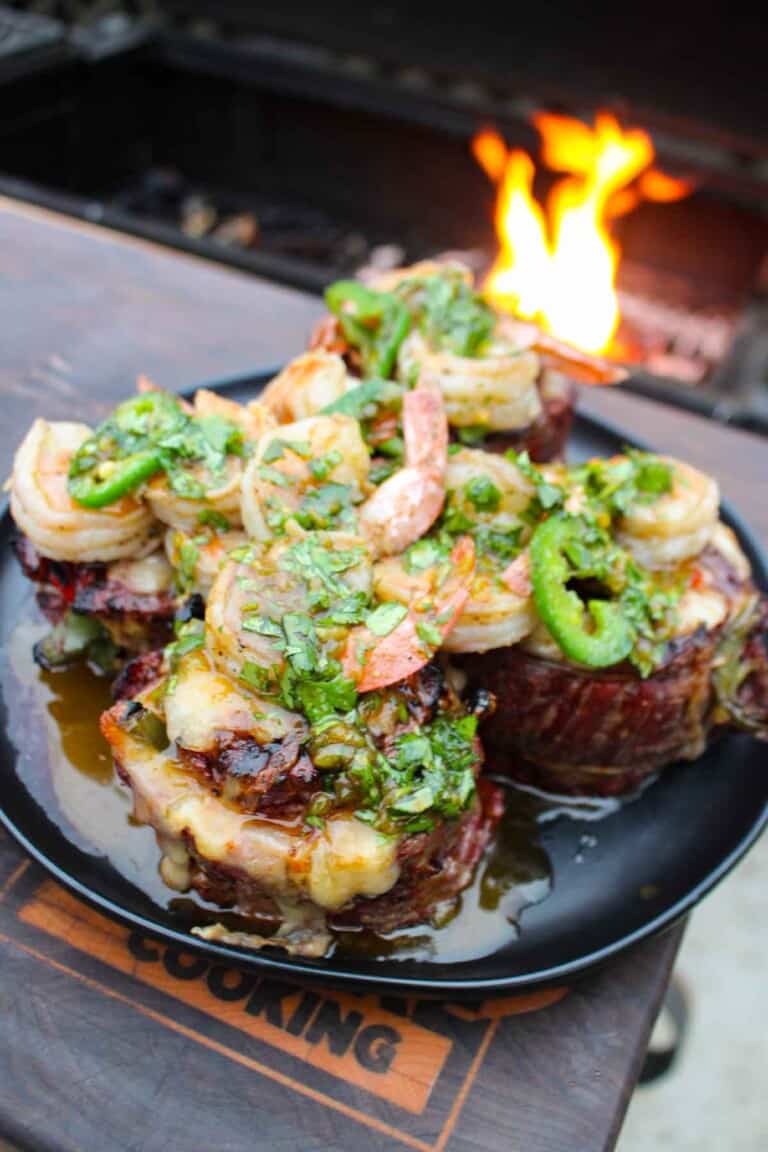
Steak pinwheels are so fun, easy and freakin’ delicious that I just can’t stop making them. There are so many flavor bomb options out there! These fajita steak pinwheels are a new spin on our classic grilled steak pinwheels, since they add fajita vegetables and shrimp on top of the steak.

Fajita steak pinwheels, grilled and ready to eat.

The key to making fajita steak pinwheels is flattening out the skirt steak before you start rolling it. The thinner you can make the steak, the easier it will roll and the better the steak fajita pinwheels will stay together. 

Why You’ll Love Fajita Steak Pinwheels

You know that feeling you get when you’re at a restaurant, you order steak fajitas, and they bring out that sizzling cast iron skillet? Everything smells, looks and tastes just incredible. These fajita steak pinwheels are all that, and the pride of knowing these are homemade. Also, the butter we’ll make in this recipe is out of this world. 

For more pinwheels, check out Spanish Garlic Steak Pinwheels, Italian Beef Pinwheels and Green Chili Salmon Pinwheels.

Fajita Steak Pinwheels Ingredients

  • Steak: The star of the show. We’ll use 2-3 whole skirt steaks, seasoned with my Jalapeno Lime Pilsner Rub, slices of Monterey Jack cheese and lime juice. 
  • Fajita Vegetables: We’re going especially classic here for fajita steak pinwheels, with sautéed onions and bell peppers seasoned with Jalapeno Lime Pilsner Rub
  • Shrimp: Who doesn’t love a good surf and turf? We’ll flavor our peeled and deveined shrimp with sliced jalapenos and yes, more Jalapeno Lime Pilsner Rub
  • Butter: Ah, the spicy butter. Chopped cilantro, jalapeno paste, my FYR RED Hot Sauce and kosher salt are a great way to take butter to the next level. 

Add flavor to everything you’re cooking

shop over the fire spice lines

Easy Roasted Tomato Salsa

I don’t know about you, but a homemade fajitas recipe doesn’t feel complete to me without a bowl of chips and salsa.

To make this easy roasted tomato salsa, cut 2 pounds of Roma tomatoes lengthwise, then put them on a foil-lined baking sheet skin side down with 1 onion (peeled and halved), 1 jalapeno (halved lengthwise, ribs and seeds removed if you don’t want it too spicy) and 4 unpeeled garlic cloves. Then, turn on your oven’s broiler and broil all the veggies for 6-8 minutes.

To finish the salsa, process all the roasted ingredients in a blender with 1 tablespoon of lime juice, 1/2 cup of fresh cilantro and kosher salt to taste. Serve with your favorite tortilla chips. 

How to Make Fajita Steak Pinwheels

Get your senses ready for some sizzling steak fajitas — but even better. 

Cooking the Fajita Vegetables

Preheat your grill for a two-zone cooking at high heat (around 400 degrees Fahrenheit). Then, place a cast iron skillet over the hot coals and add some olive oil or beef tallow. Sauté your bell peppers and onions with 1.5 tablespoons of Jalapeno Lime Pilsner Rub for 5-7 minutes until softened. Once the fajita vegetables are done, pull them off the grill to cool for 5 minutes.

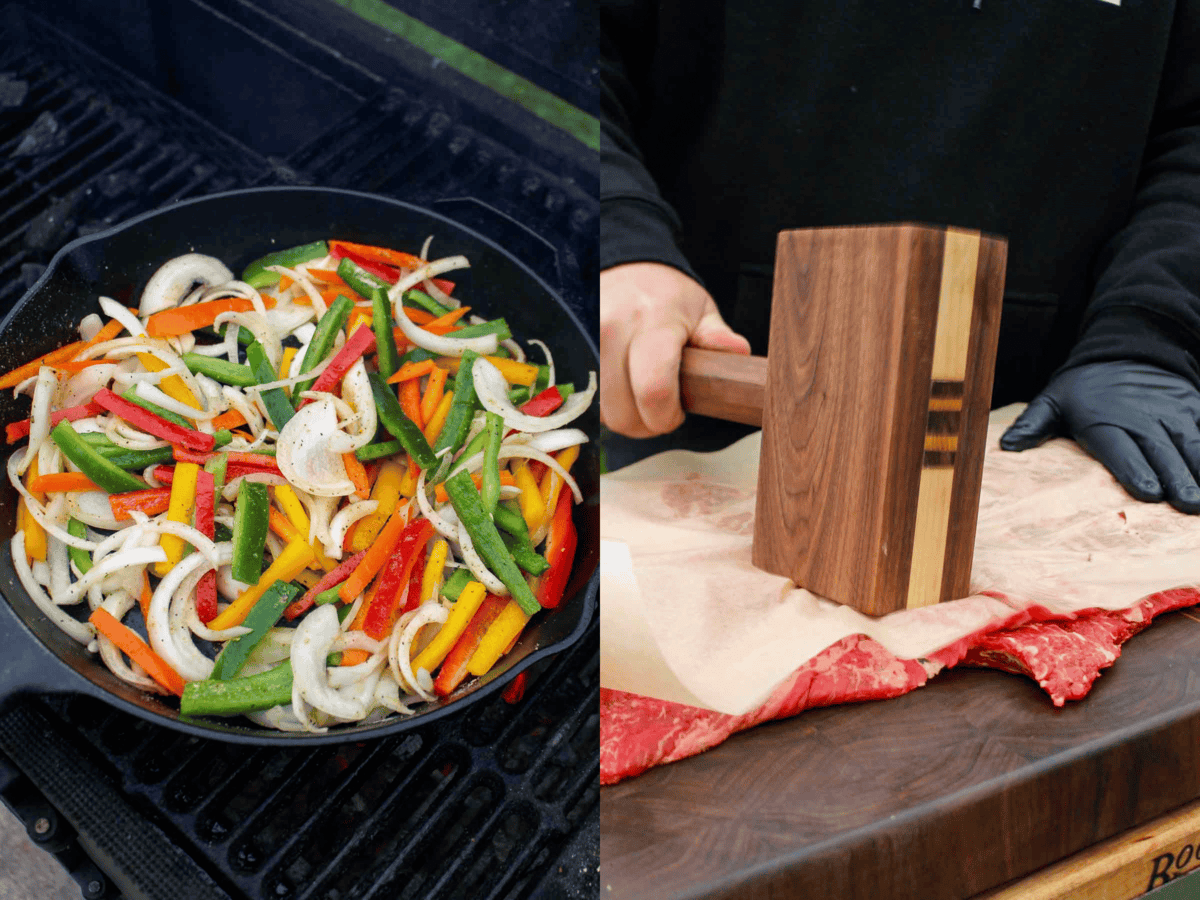
Fajita vegetables in a cast iron skillet and flattening skirt steak for pinwheels.

Making the Steak Pinwheels

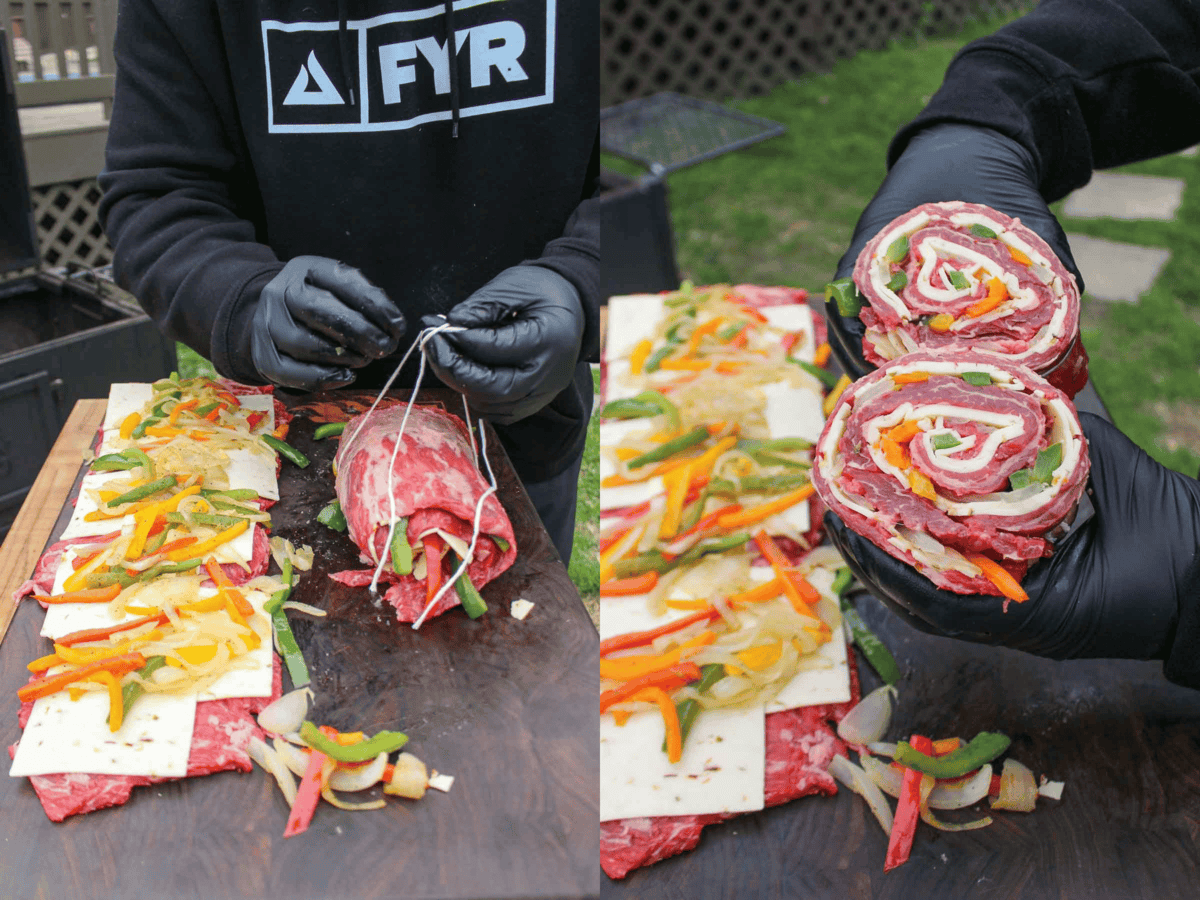
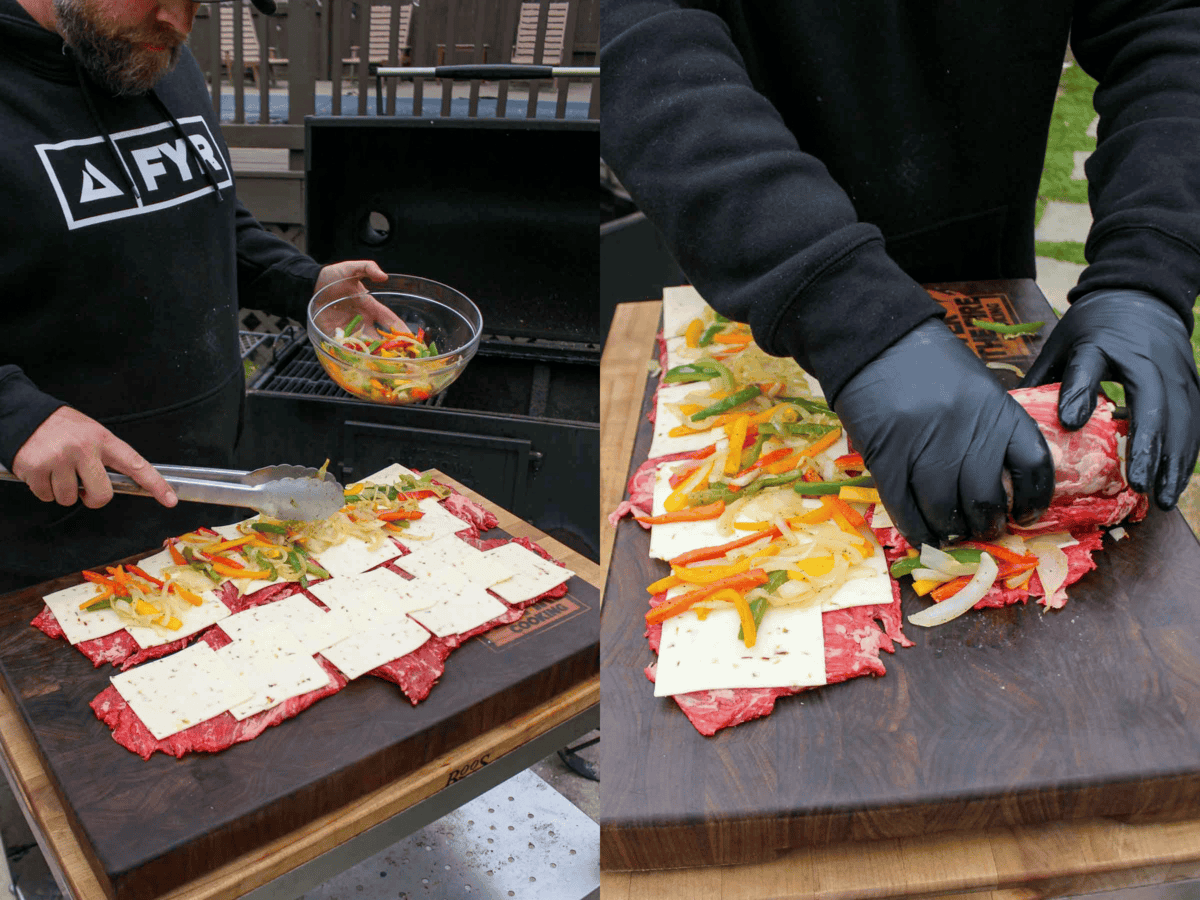
First, lay one of your 2-3 skirt steaks out on a cutting board, slice them in half and cover with parchment paper or a sheet of plastic wrap. Using a heavy mallet or food mallet, hammer the skirt steak until it is less than 1/2 inch thick. Then, slather the surface area of your steak with beef tallow and season both sides with 1/4 cup of my Jalapeno Lime Pilsner Rub. Next, add a layer of sliced Monterey Jack cheese, followed by your sautéed veggies.

Preparing the steak pinwheels with cheese and fajita vegetables.

Carefully roll the skirt steak up lengthwise to create the pinwheel. Secure the roll with two strings of butcher’s twine and slice between them to make two separate pinwheels. Repeat this process with the rest of the skirt steak for all of the pinwheels.

Grilling the Pinwheels

Add your pinwheels to the hot side of the grill. Then sear each side for 1 minute per side, or until they have developed a nice crust. Once they have a nice crust on the outside, pull the pinwheels over to the cool side of the grill. Cook until they reach 125 degrees F internal temperature (about 10-15 minutes more). When the steaks are done, pull them off the grill and let rest for 10 minutes. 

Grilling the fajita steak pinwheels.

Cooking the Shrimp

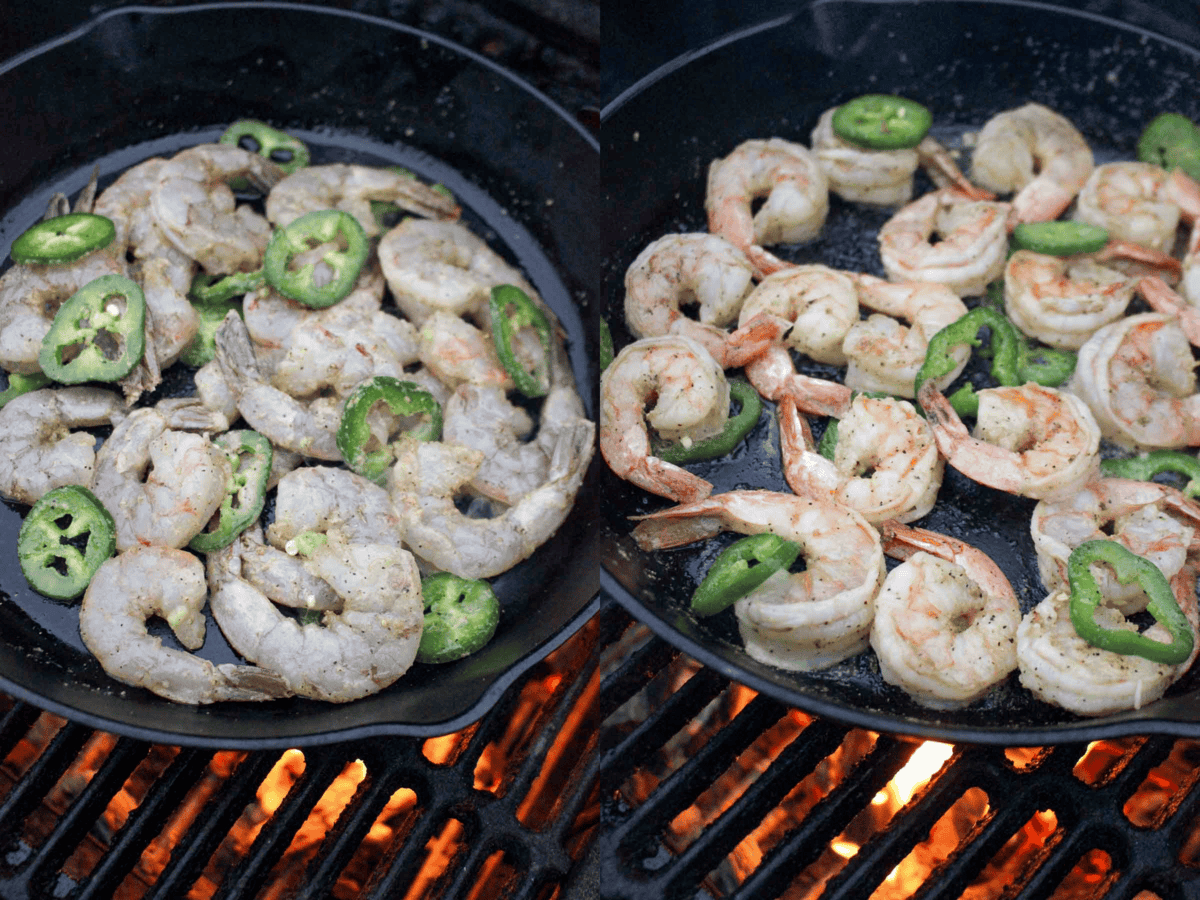
For the shrimp, place a cast iron skillet on the medium-high heat side of the grill with a little beef tallow. In a large bowl, season your shrimp with 2.5 tablespoons of my Jalapeno Lime Pilsner Rub and 1.5 tablespoons of sliced jalapenos, then add to the skillet. Cook for 4-5 minutes until the shrimp are no longer translucent but an opaque white. 

Cooking the shrimp in a skillet on the grill.

Serving the Fajita Steak Pinwheels

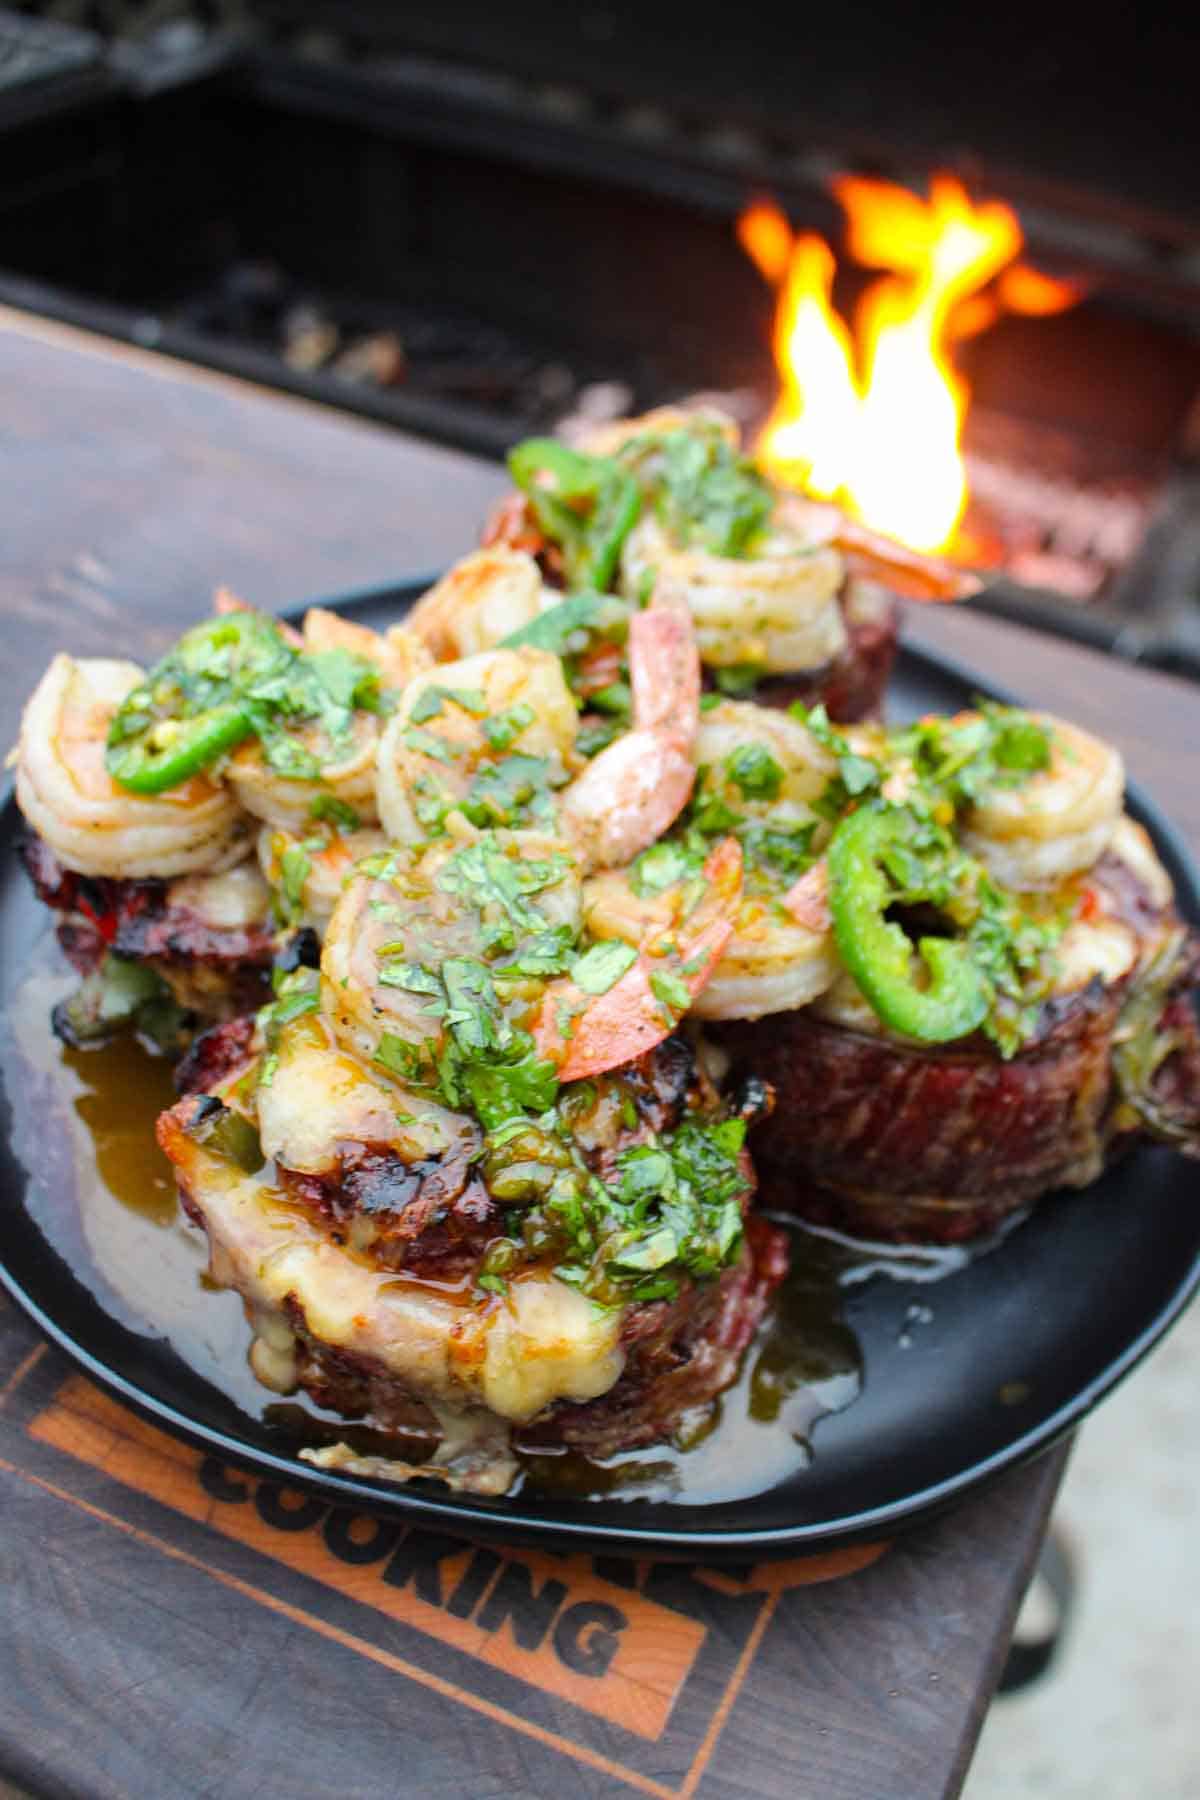
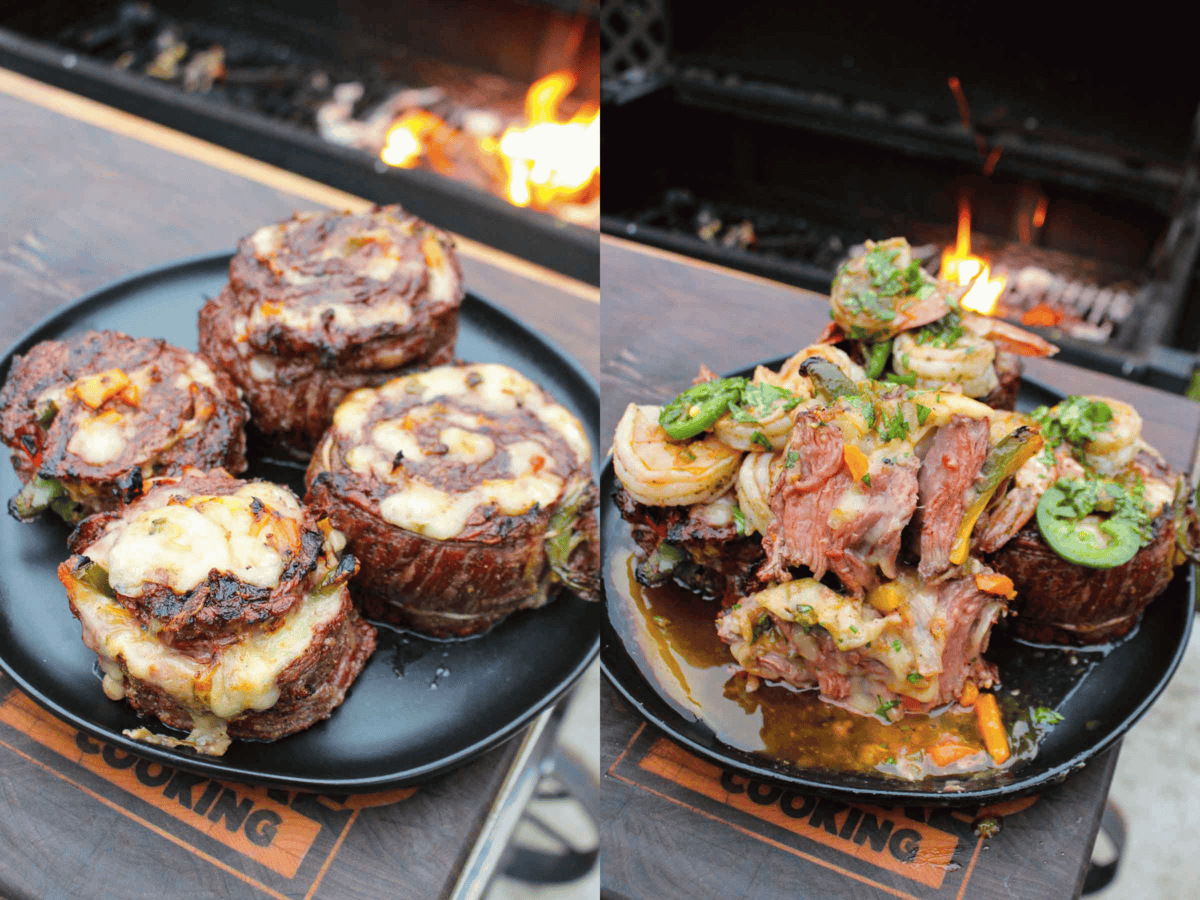
Finally, place the cooked shrimp on top of your pinwheels. Mix together 1 cup of melted butter, 2.5 tablespoons of chopped cilantro, 1 tablespoon of jalapeño paste and 1 tablespoon of my FYR Red Hot Sauce for your spicy butter and garnish over everything. Serve and enjoy!

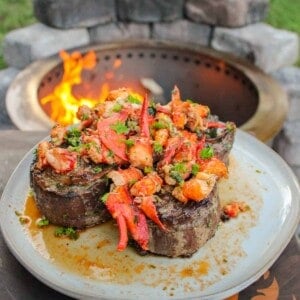
Topping the fajita steak pinwheels with shrimp and getting ready to eat.

What to Serve with Fajita Steak Pinwheels

​Basically anything that goes with steak fajitas goes with fajita steak pinwheels! Think arroz rojo (Mexican rice) or even a corn salsa if you’re feeling fancy. 

Leftovers and Reheating

If you have any leftover fajita steak pinwheels, wrap them up tightly in aluminum foil. Then, place them in an airtight container in the fridge for 3-4 days. When it’s time to reheat, open the aluminum foil and add a little beef tallow to keep the meat moist while warming over the grill or in a 250-degree oven for 10-12 minutes.

For More Pinwheels

FAQs

How do I adjust the spice level? 

There are plenty of ways you can adjust the spice level up or down in this fajita steak pinwheels recipe. You can change the amount of sliced jalapeños in the shrimp, or play with how much jalapeño paste and FYR Red Hot Sauce you want in the spicy butter. 

I can’t find skirt steak. Can I use other cuts of beef? 

Sure! Flank steak is a solid option for fajita steak pinwheels. Just make sure you butterfly it and pound it to that 1/2 inch thickness so it’s easy to roll into flank steak pinwheels.

What are some other cheese options for these pinwheels? 

​I love a good pepper jack cheese for these fajita steak pinwheels, or you could even use slices of provolone cheese if you want something milder. 

Get The Cookbooks!

Flavor X Fire & FOOD X Fire

By Derek Wolf

All the major tastes—salty, sour, sweet, bitter, and umami—are explored in depth, along with an investigation of other components you should consider when it comes to flavor, such as aroma, heat, and texture.

Fajita steak pinwheels, grilled and ready to eat.
Print

Fajita Steak Pinwheels

Fajita steak pinwheels are a fun, easy take on surf and turf that make for real crowd pleaser. The spicy butter is out of this world!
Course Dinner, Lunch, Main Course
Cuisine American, Mexican
Prep Time 40 minutes
Cook Time 30 minutes
Total Time 1 hour 10 minutes
Servings 4 people
Calories 3723kcal
Author Derek Wolf

Ingredients

Steak:

Veggies:

Shrimp:

Spicy Butter:

  • 1 cup Melted Butter unsalted
  • 2.5 tbsp Chopped Cilantro
  • 1 tbsp Jalapeno Paste
  • 1 tbsp FYR RED Hot Sauce
  • Kosher Salt to taste

Instructions

  • Preheat your grill for a two zone high heat temperature (around 400F).
  • Add a cast iron skillet over the hot coals with oil. Add your bell peppers and onions with some Jalapeno Lime Pilsner Rub to saute for 5-7 minutes until softened. Pull off once done to cool for 5 minutes.
  • Lay your skirt steak out on a cutting board, slice it in half and cover it with parchment paper or plastic wrap. Using a heavy mallet or food mallet, hammer the skirt steak until it is less than ½” thick.
  • Slather your steak with beef tallow and season both sides with my Jalapeno Lime Pilsner Rub. Next, add a layer of sliced jack cheese followed by your sauteed veggies.
  • Carefully roll the skirt steak up lengthwise to create the pinwheel. Secure the roll with two strings of butcher twine and slice between them to make two separate pinwheels. Repeat this with the rest of the skirt steak for all of the pinwheels.
  • Add your pinwheels to the hot side of the grill to sear each side for 1 minute per side or until they have developed a nice crust.
  • Once they have a nice crust on the outside, pull the pinwheels over to the cool side of the grill to cook until they reach 125F internal (about 10-15 minutes more).
  • When the steaks are done, pull them off and let rest for 10 minutes.
  • Add a cast iron to medium high heat with a little beef tallow.
  • Season your shrimp with my Jalapeno Lime Pilsner Rub, sliced jalapenos and add to the skillet.
  • Cook for 4-5 minutes until the shrimp are no longer translucent but an opaque white.
  • Serve the pinwheels with the shrimp on top. Mix together your Spicy Butter and garnish over everything. Serve and enjoy!

Notes

Easy Roasted Tomato Salsa
I don’t know about you, but a homemade fajitas recipe doesn’t feel complete to me without a bowl of chips and salsa. To make this easy roasted tomato salsa, cut 2 pounds of Roma tomatoes lengthwise, then put them on a foil-lined baking sheet skin side down with 1 onion (peeled and halved), 1 jalapeno (halved lengthwise, ribs and seeds removed if you don’t want it too spicy) and 4 unpeeled garlic cloves. Then, turn on your oven’s broiler and broil all the veggies for 6-8 minutes. To finish the salsa, process all the roasted ingredients in a blender with 1 tablespoon of lime juice, 1/2 cup of fresh cilantro and kosher salt to taste. Serve with your favorite tortilla chips. 

Nutrition

Calories: 3723kcal | Carbohydrates: 106g | Protein: 302g | Fat: 246g | Saturated Fat: 140g | Polyunsaturated Fat: 12g | Monounsaturated Fat: 72g | Trans Fat: 10g | Cholesterol: 2023mg | Sodium: 3181mg | Potassium: 5883mg | Fiber: 26g | Sugar: 40g | Vitamin A: 22205IU | Vitamin C: 751mg | Calcium: 1136mg | Iron: 32mg

The post Fajita Steak Pinwheels appeared first on Over The Fire Cooking.
turkey meatloaf for skeptics

Meatloaf has a PR problem. It took me a while to come around to it; I didn’t grow up eating it, and certainly nothing about the name — a loaf, a loaf of meat — convinced me I was missing a thing. But, slowly, I have tiptoed i…
Meatloaf has a PR problem. It took me a while to come around to it; I didn’t grow up eating it, and certainly nothing about the name — a loaf, a loaf of meat — convinced me I was missing a thing. But, slowly, I have tiptoed into the light, and now I get it. It’s not cute, but it’s objectively delicious. Imagine if we only ate things that were camera-ready — it would be a world without gravy, mushroom soup, and lopsided made-with-love frosted cakes. We absolutely must not stand for that.
Read more »

Juicy Brazilian Maminha Baked with Onion and Beer

I will teach you how to make a juicy roasted piece of meat!

What kind of meat can I use? Brazilian maminha is a cut of beef, originating from the triangular area of the sirloin, often hailed as a beloved choice in Brazilian churrascarias.

This juicy and flavorful meat is located on the backside of the animal, nestled between the loin and the thigh.

It is sometimes referred to as «bottom round» due to its position atop the rear legs, encompassing the hips and rump region.

What type of beer can I use? You have the option to use both alcoholic and non-alcoholic beer. For a richer aroma, you can opt for a dark beer.

How long should I roast the meat? The cooking time depends on the weight of the meat. To achieve a medium roast for a piece weighing 1.5-1.8 kg, you will need about 1 hour. For a well-done piece of meat, it will take approximately 80 minutes to cook.


Juicy Brazilian Maminha Baked with Onion and Beer

PREP TIME COOK TIME MAKES
80 minutes 15 minutes 6-8 servings

INGREDIENTS (serves 2)

  • 1 piece of beef for maminha (~1,5 kg / 3,3 lbs)
  • 2 onion
  • 0,33 ml light beer (12 oz)
  • ⅓ cup (70 ml) water
  • 5 garlic cloves
  • 2 sprigs of rosemary
  • 3 tbsp of olive oil for frying
  • 1 tbsp of butter
  • Salt
  • Black pepper

INSTRUCTIONS

You can find a short video recipe of Maminha in my Instagram. Let’s be friends!

  1. Preheat the oven to 200°C / 390°F. Slice the onion into rings or half rings. Transfer to a baking dish. 
  2. Add garlic cloves and rosemary on top. 
  3. Place the meat on top. 
  4. Drizzle vegetable oil for frying on both sides, spread the oil with a brush, and season with salt and pepper. 
  5. The meat should be placed with the fat side up.
  6. Pour beer and water on the sides of the meat. Cover the dish with foil and bake for 1 hourб if you want medium (a pink cut of meat) and 70-80 min for a well done.
  7. Remove the foil, spread butter on top, and bake for an additional 20 minutes until golden brown.


UKRAINIAN HOME COOKING
Favorite recipes with love

The book is available on Amazon in different countries.

50% of each sale will be donated to Charity to help the children and people of Ukraine.

You may like these too…

New Recipes

New recipes in your inbox

Processing…
Success!

Beef Stew

This is a scrumptious, simple beef stew recipe that’s perfect for warming your after a long winter day.

This is a scrumptious, simple beef stew recipe that’s perfect for warming your after a long winter day.

My favorite cut of beef is perfect for this roast. This is boneless beef shank, which takes a long time to stew, but the resulting roast is perfect. The shank is one of the meatiest and most collagen-rich parts of the animal.

These chunks are great for goulash, thick winter soups, and stew. They are rich in connective tissue that breaks down into a silky texture when cooked slowly, making a wonderful gravy. The meat is tender and flavorful.

What to serve with the beef stew? Mashed potatoes, pasta with olive oil or butter (sprinkle with cheese if you like), and rice. I love eating it with pickles.

How to thicken beef stew? You can flour the meat before frying. Or when the stew is ready, fry a 1 tbsp of flour in 1 tbsp of butter, pour in half a cup of cold water and stir to avoid lumps. Pour the mixture into the stew. Cook 5 min. But boneless beef shank and vegetables makes a rich gravy.
PREP TIME COOK TIME MAKES
15 minutes 120 minutes 5-6 servings

INGREDIENTS (serves 5-6)

  • 2.2 lbs (1 kg) beef shank (boneless)
  • 2 stalks leek
  • 3 carrots
  • 4 celery stalks
  • 2 big tomatoes 
  • 3 cloves of garlic
  • 1 glass (150 ml) dry red wine

  • 2 tsp paprika
  • ⅓ ground allspice
  • 1 tso ground coriander
  • 1 tsp ground black pepper
  • ½ -1 tsp chili pepper flakes
  • ⅓ tsp grated nutmeg
  • 2 bay leaves
  • 3-4 thyme sprigs
  • 4-5 tbsp oil for frying

INSTRUCTIONS

You can find the video recipe of Beef stew in my InstagramLet’s be friends!

  1. Cut the meat into small pieces. Pour the frying oil into a heavy-bottomed pot or deep frying pan. Put the meat.
  2. Add all the spices except herbs (coriander, ground black pepper, allspice, ground pepper, paprika, grated nutmeg, and chili) to the meat and fry everything together.
  3. Cut the leek lengthwise and chop coarsely. Cut the carrots into thick slices or circles. Coarsely chop the celery and add it, along with the carrots, leek, and finely chopped garlic, to the meat.
  4. Continue frying, then pour in the wine, add the diced tomatoes, thyme, and bay leaves.
  5. Simmer over a very low heat until the meat is tender (this will take about 2 hours).

If, despite the warnings, you were not cooking on a very low heat and you did not get enough gravy, add just a little water.

  1. Salt and add sprigs of parsley 10 minutes before readiness. Serve with mashed potatoes, rice, or pasta.

UKRAINIAN HOME COOKING
Favorite recipes with love

The book is available on Amazon in different countries.

50% of each sale will be donated to Charity to help the children and people of Ukraine.


New recipes in your inbox

Processing…
Success!

You may like these too…

New Recipes

Bestsellers