Keto Biscuits
My keto biscuits are crisp on the outside while buttery, soft, and flaky inside. They are quick and easy to make, and each biscuit has just 2 grams of carbs! If you’re after tall, flaky, buttery biscuits that skip the white flour and sugar, you&#…
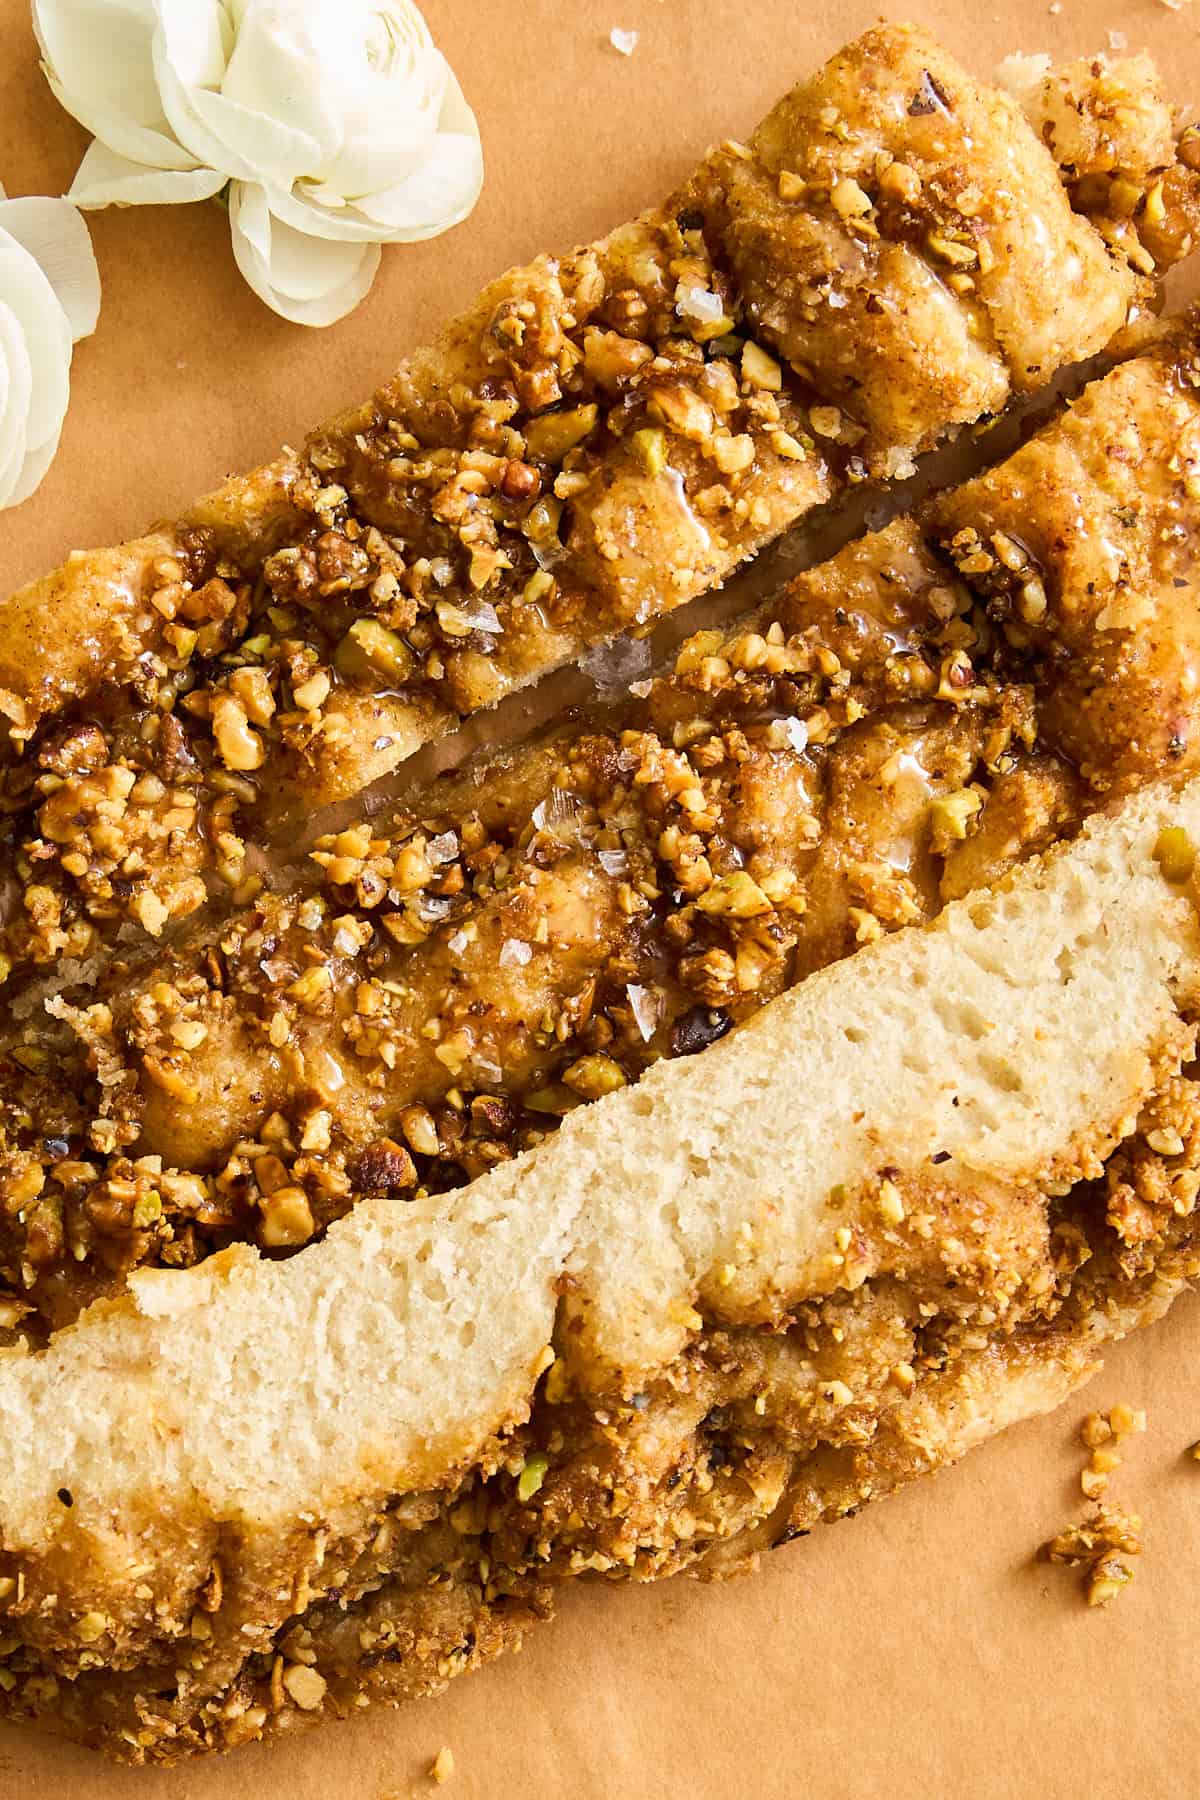 Enjoy the flavors of your favorite treat with this rich, nutty dessert focaccia that tastes just like classic focaccia!
 This easy Focaccia Bread recipe is no knead and so simple to make. It’s perfect for beginners and tastes so good! The best part of this focaccia is making it with herbs and olive oil or anything you like – even turn it into pizza dough! Focaccia is an Italian bread that’s baked flat. It’s a yeast…
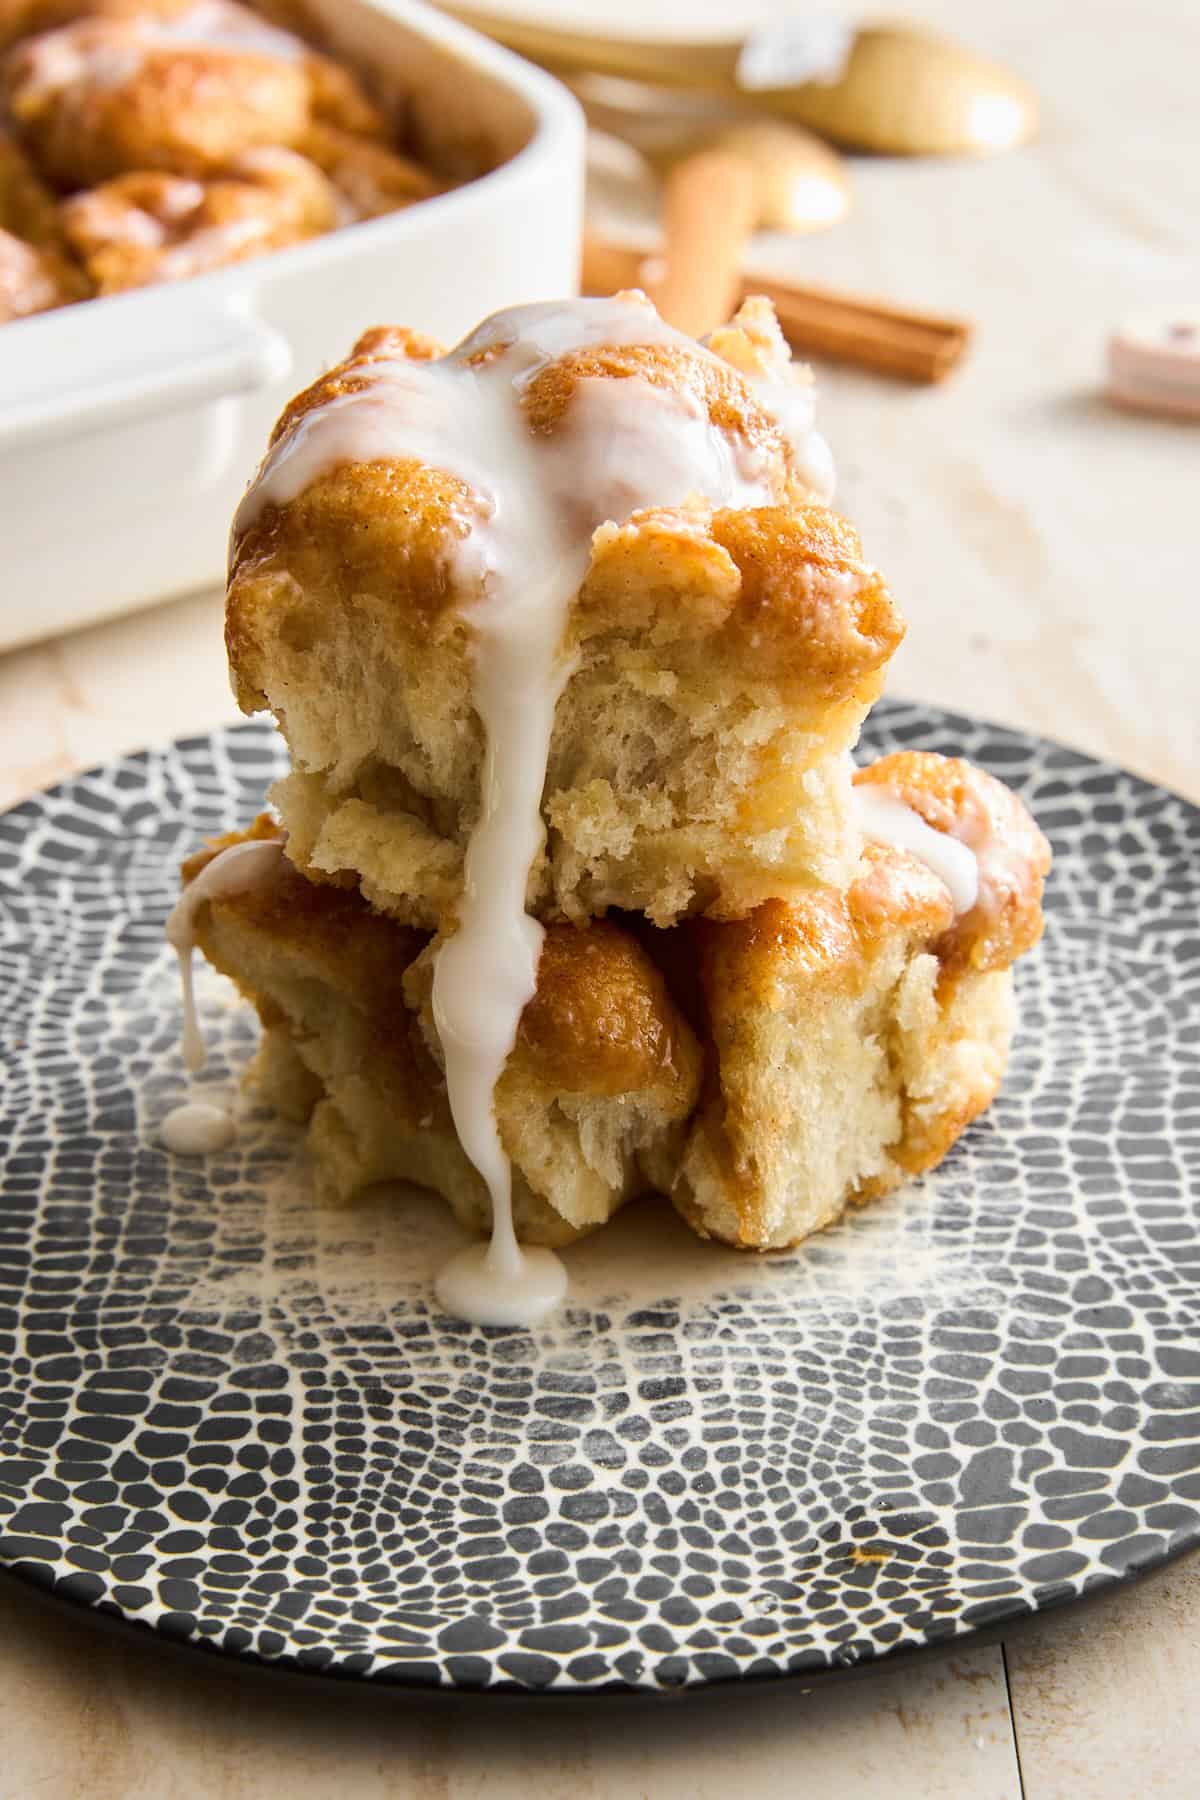 Enjoy all the warm, sweet flavors of cinnamon rolls with the convenience of an easy baked focaccia for a delicious breakfast or dessert!
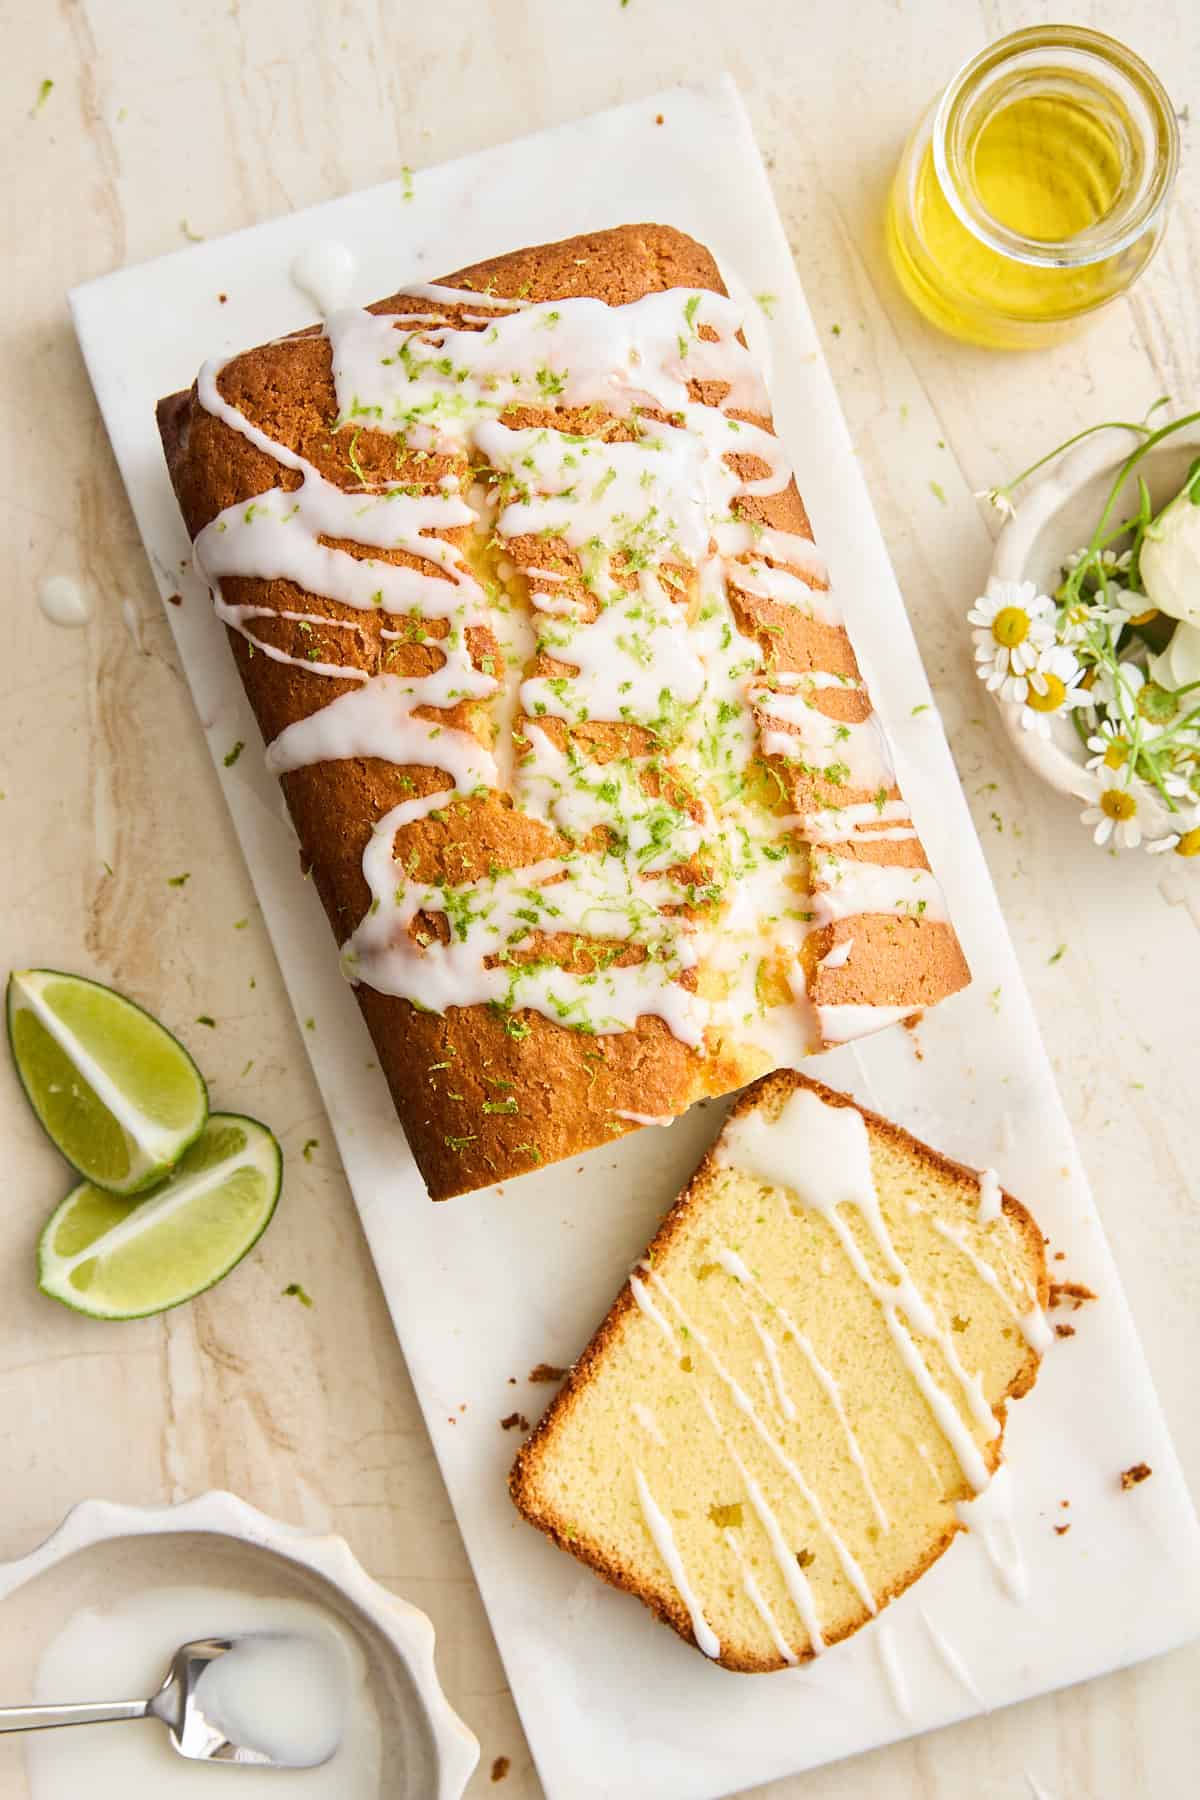 Enjoy all the flavors of your favorite pie with a lot less work, thanks to this quick and easy key lime bread topped with lime glaze!