Steak Mac and Cheese
Let’s just say it: Steak Mac and Cheese is the kind of dish that makes grown men tear up with joy. We’re…
The post Steak Mac and Cheese appeared first on Over The Fire Cooking.
Let’s just say it: Steak Mac and Cheese is the kind of dish that makes grown men tear up with joy. We’re…
The post Steak Mac and Cheese appeared first on Over The Fire Cooking.
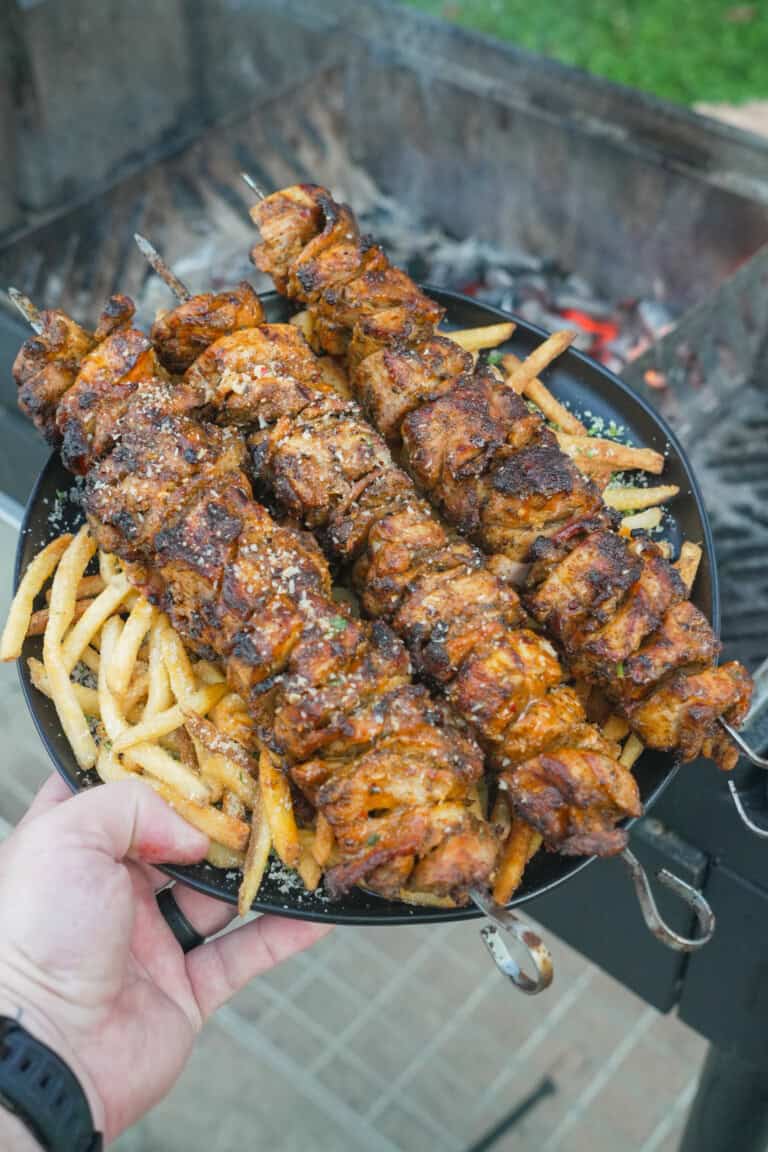
Garlic. Parmesan. Chicken. Sounds like the best dinner ever, right? And this garlic Parmesan chicken skewers recipe lives up to…
The post Garlic Parmesan Chicken Skewers appeared first on Over The Fire Cooking.
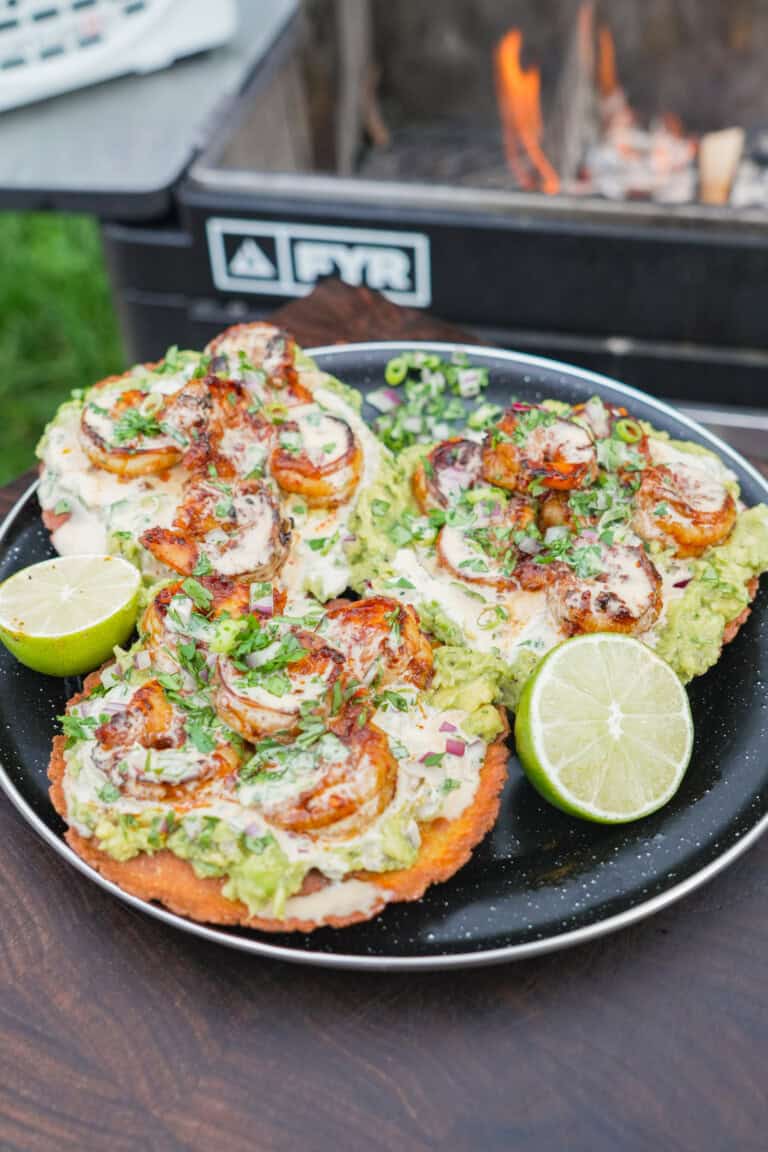
Want crunch from crispy tortillas, satisfaction from juicy shrimp and and incredible flavor from sauce and garnishes? Then I’ve got…
The post Shrimp Tostadas appeared first on Over The Fire Cooking.
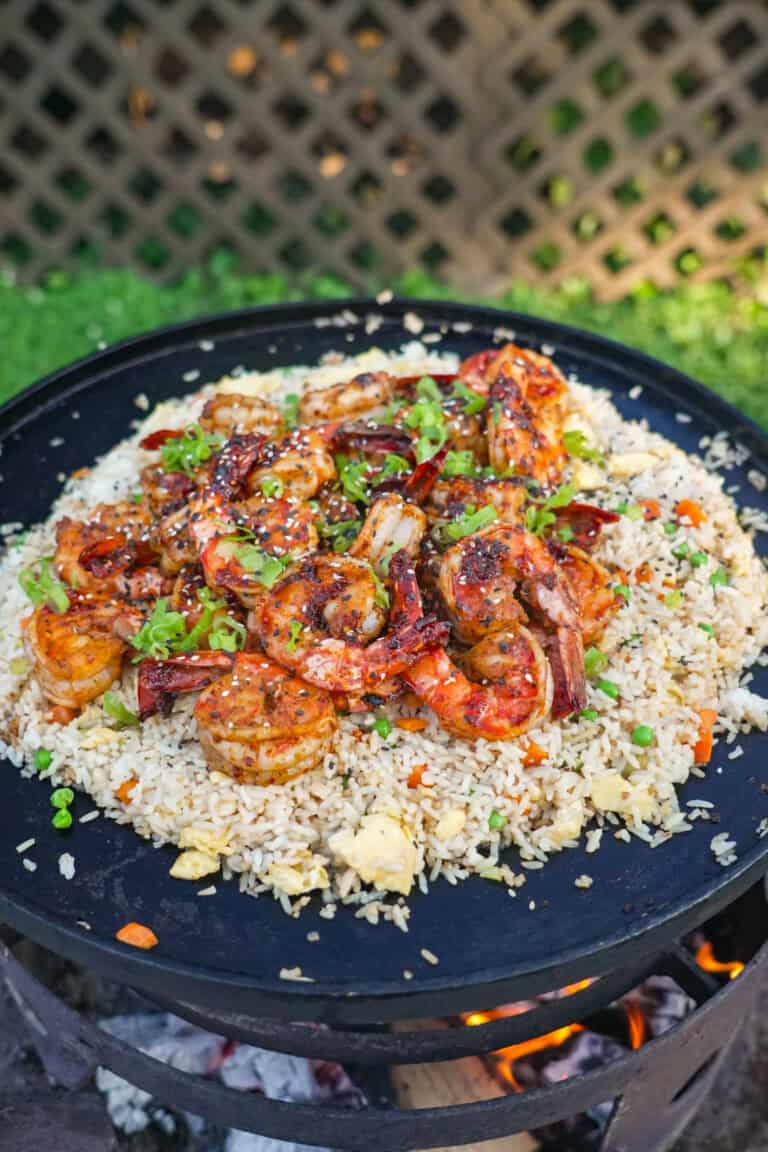
I love a good surf and turf. So, after I made this steak fried rice recipe, naturally the wheels started turning about…
The post Shrimp Fried Rice appeared first on Over The Fire Cooking.

Birria Stuffed Bread is what happens when you take everything you love about slow-cooked beef, fire cooking, and melty cheese—and…
The post Birria Stuffed Bread appeared first on Over The Fire Cooking.
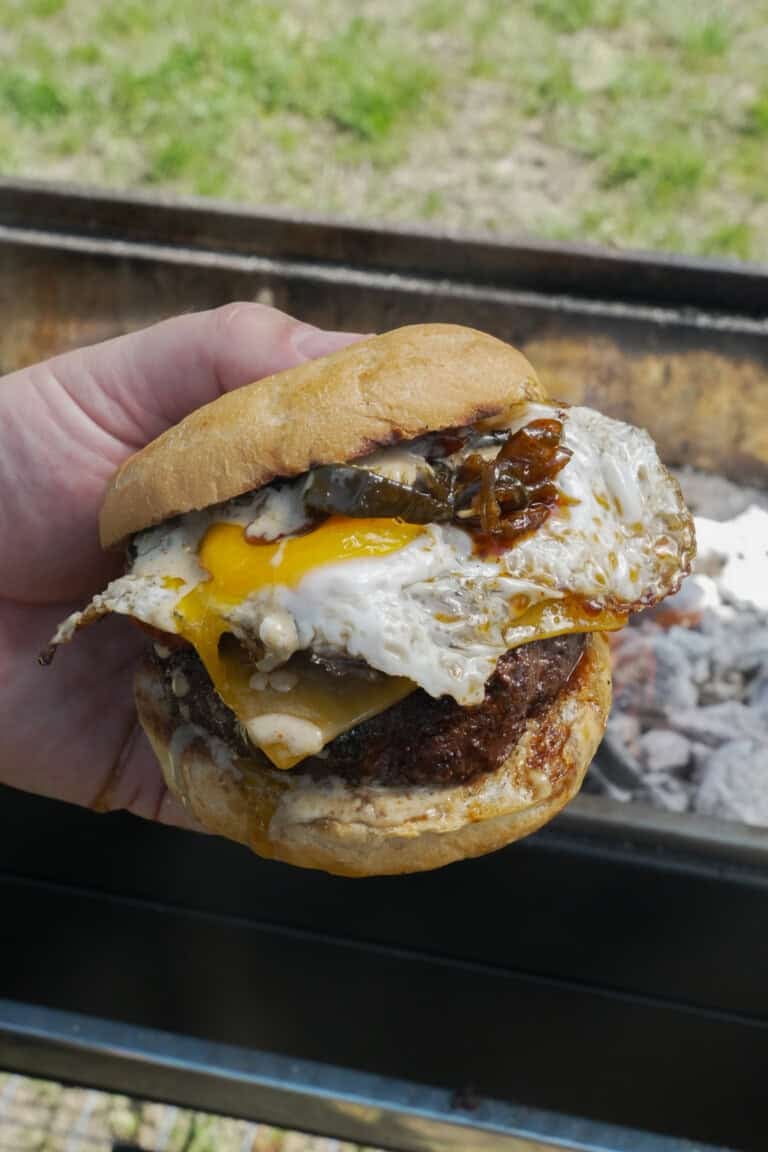
When it comes to burgers, I’m always chasing new favorite ways to take the bold and craveable to a whole…
The post Cowboy Candy Burger appeared first on Over The Fire Cooking.
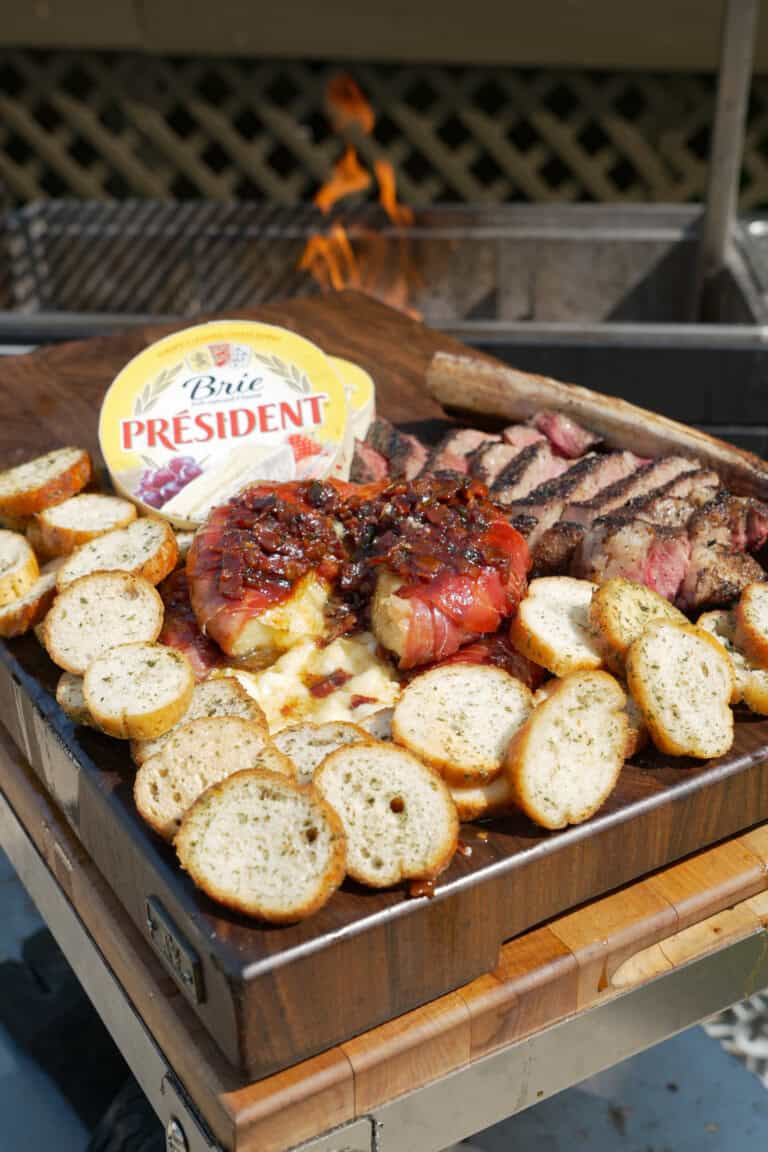
Salty prosciutto, melty brie, sweet and savory and spicy bacon jam? This prosciutto-wrapped brie with bacon jam has literally everything.…
The post Prosciutto-Wrapped Brie with Bacon Jam appeared first on Over The Fire Cooking.
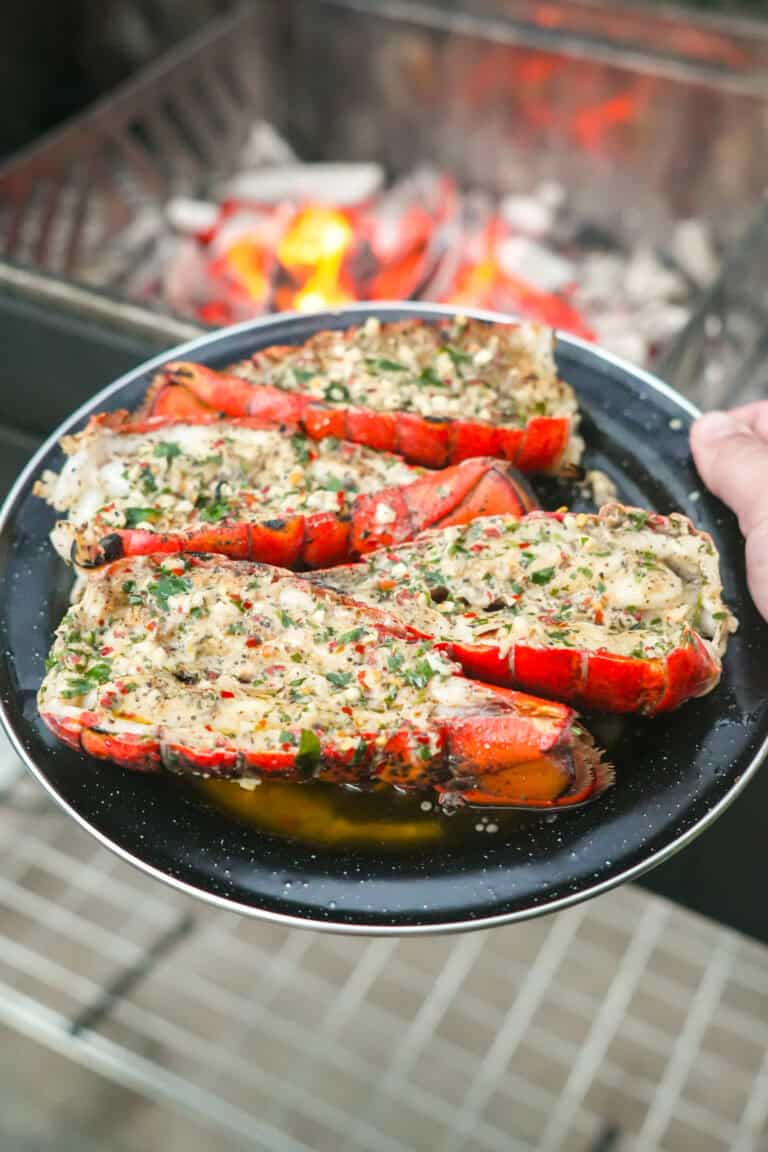
Grilled Lobster Tails with Beer Butter might just be the most freakin’ delicious way to celebrate summer. Fresh lobster tails…
The post Grilled Lobster Tails with Beer Butter appeared first on Over The Fire Cooking.
Looking to kick back next to your grill for the day and enjoy an absolutely freakin’ delicious meal at the…
The post Birria Ramen appeared first on Over The Fire Cooking.
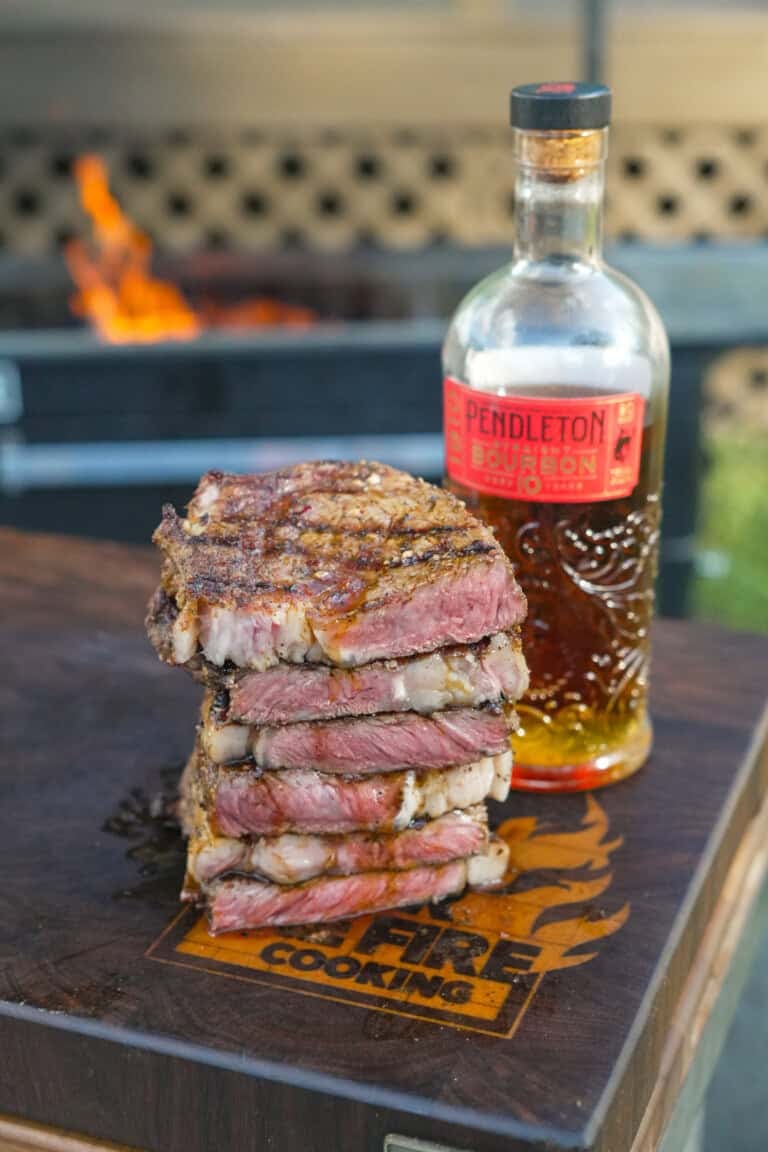
We recently hosted a big summer steak and fries party, which was absolutely epic — and exactly my type of…
The post Bourbon Butter for Grilled Steaks appeared first on Over The Fire Cooking.
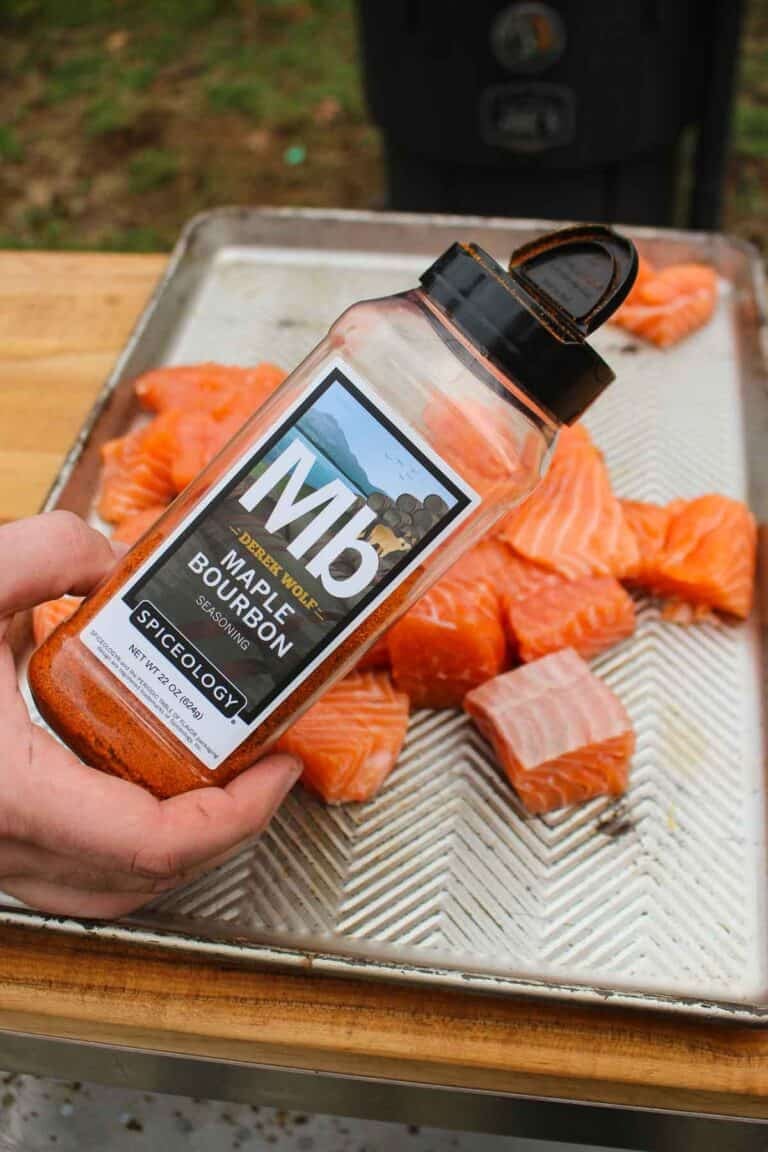
If you’re chasing bold flavor beyond table salt and black pepper, my Maple Bourbon BBQ Rub delivers. This spice mix…
The post How to Use Maple Bourbon BBQ Rub appeared first on Over The Fire Cooking.
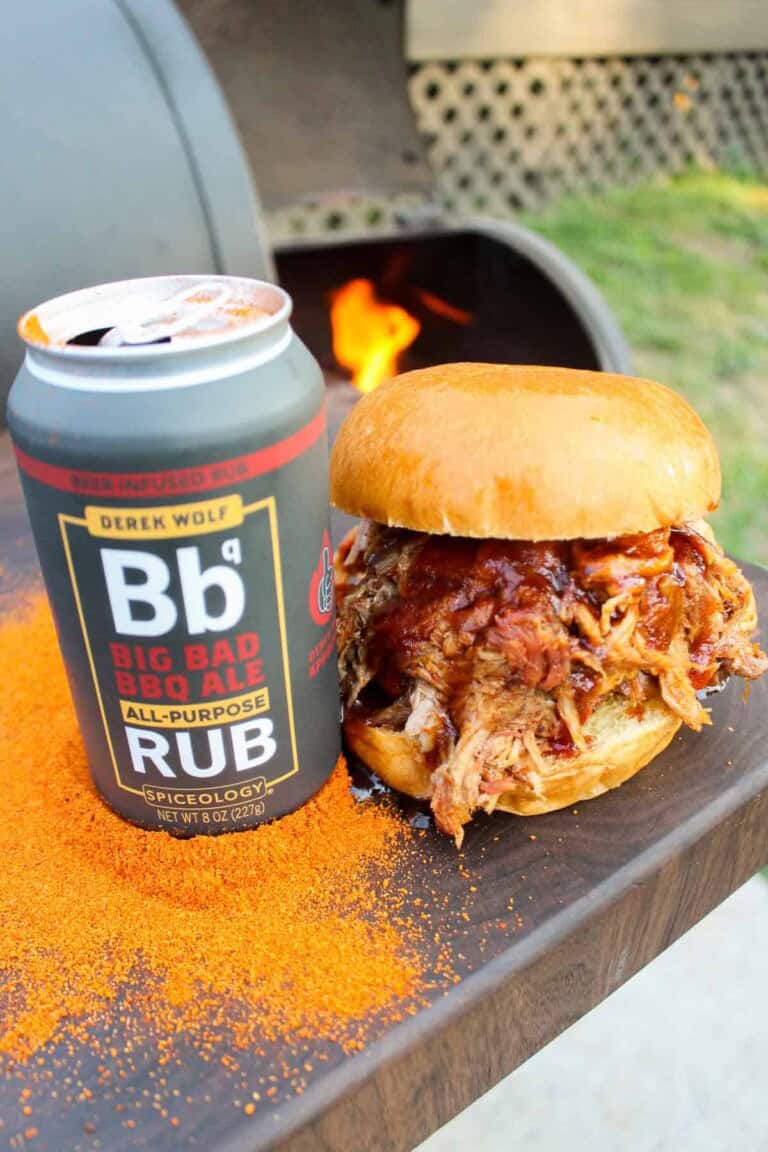
This isn’t my usual kind of post, but since it features some of my favorite beer rub recipes, let me hold your…
The post Beer Rub Recipes appeared first on Over The Fire Cooking.
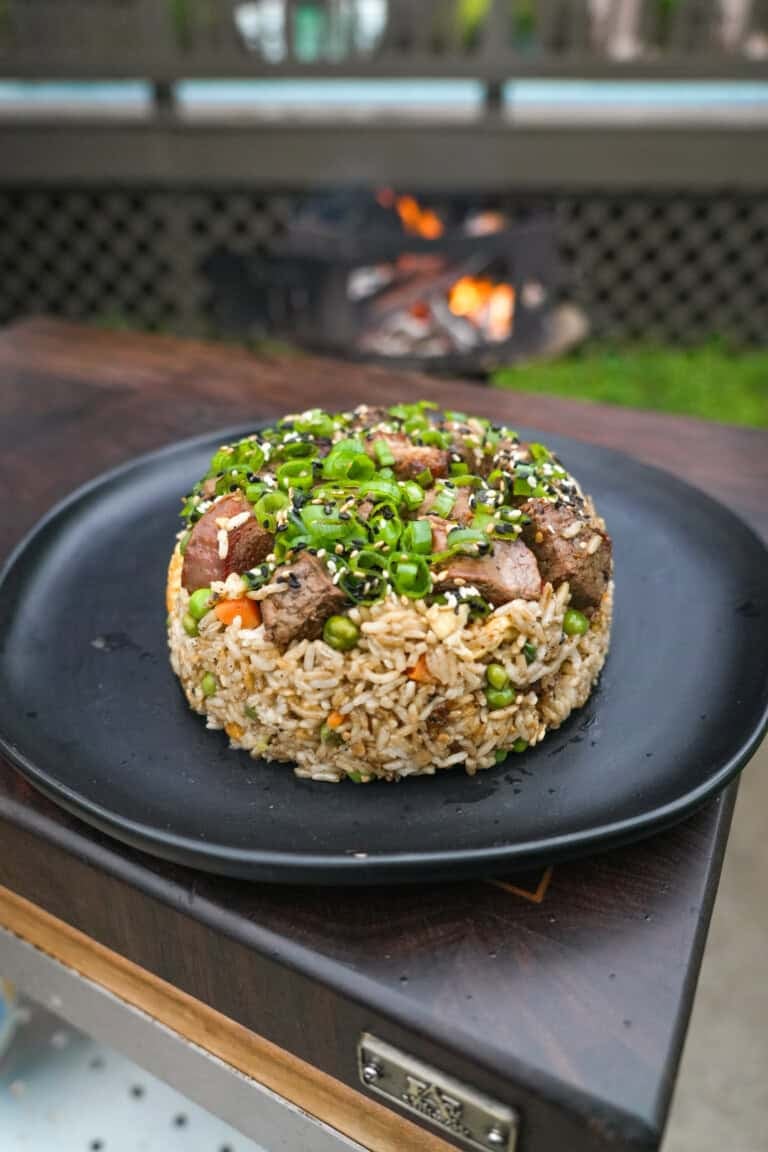
Sometimes the most freakin’ delicious meals come from leftovers. That’s exactly the case with this steak fried rice recipe. If…
The post Steak Fried Rice appeared first on Over The Fire Cooking.
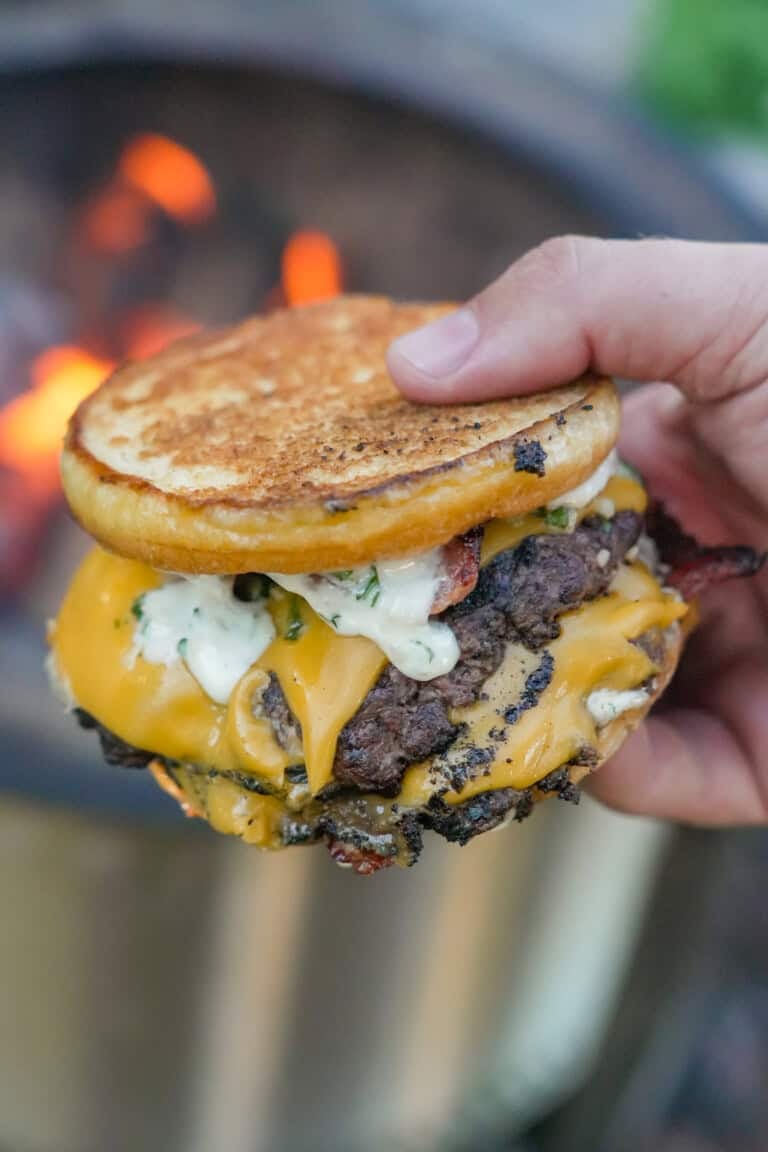
When it comes to homemade burgers, I’ve got a lot of favorites, but this Garlic Butter Burger is one at…
The post Garlic Butter Burger appeared first on Over The Fire Cooking.
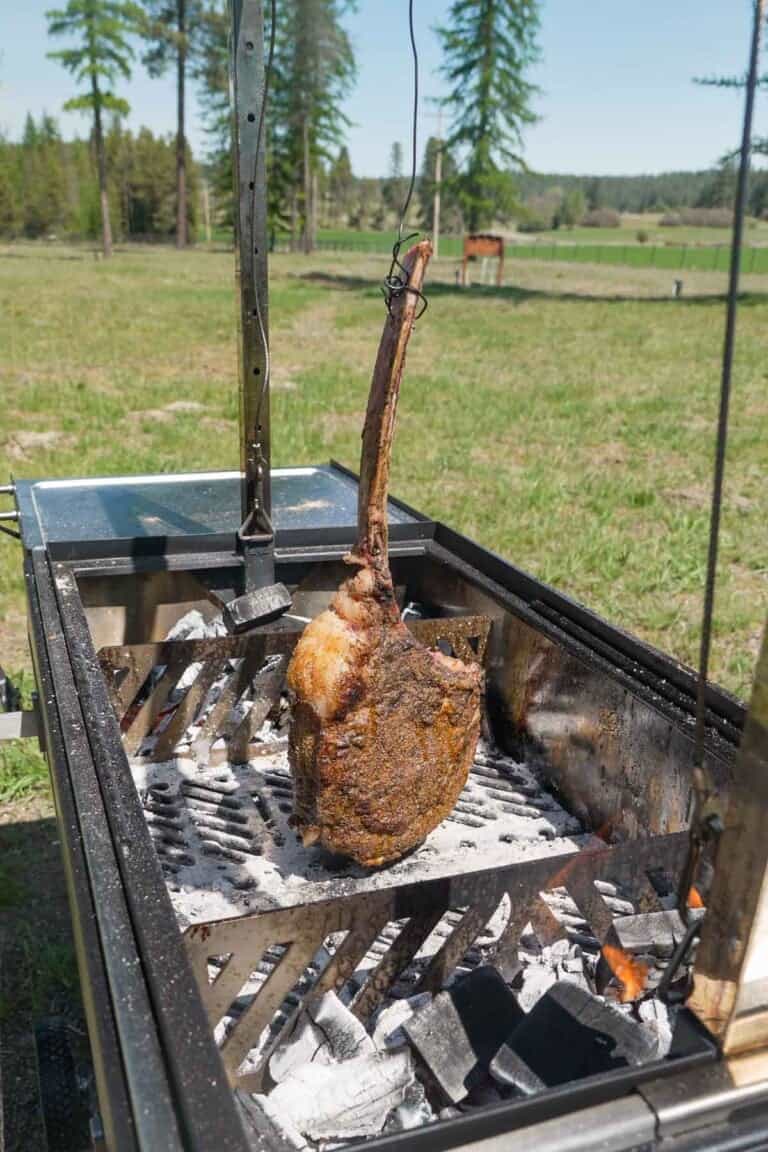
If you’re all about power tools, chopping wood, and dreaming of the perfect steak, then the hanging tomahawk steak is…
The post Hanging Tomahawk Steak appeared first on Over The Fire Cooking.
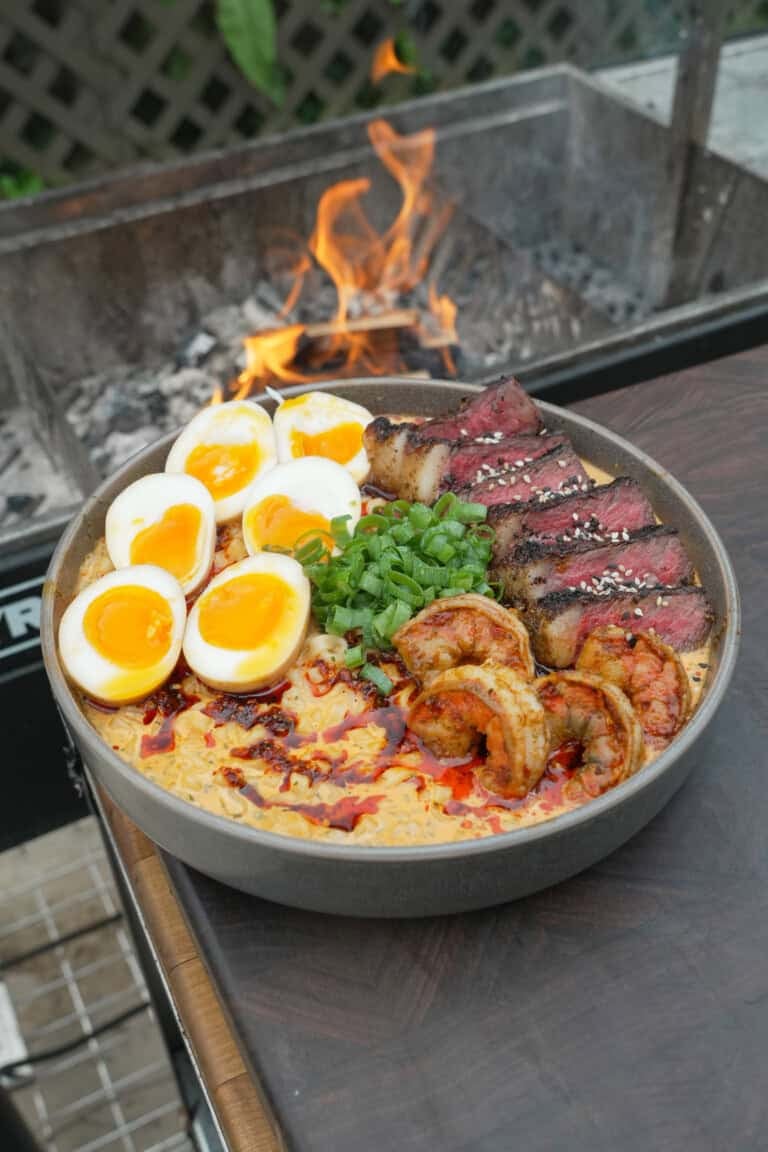
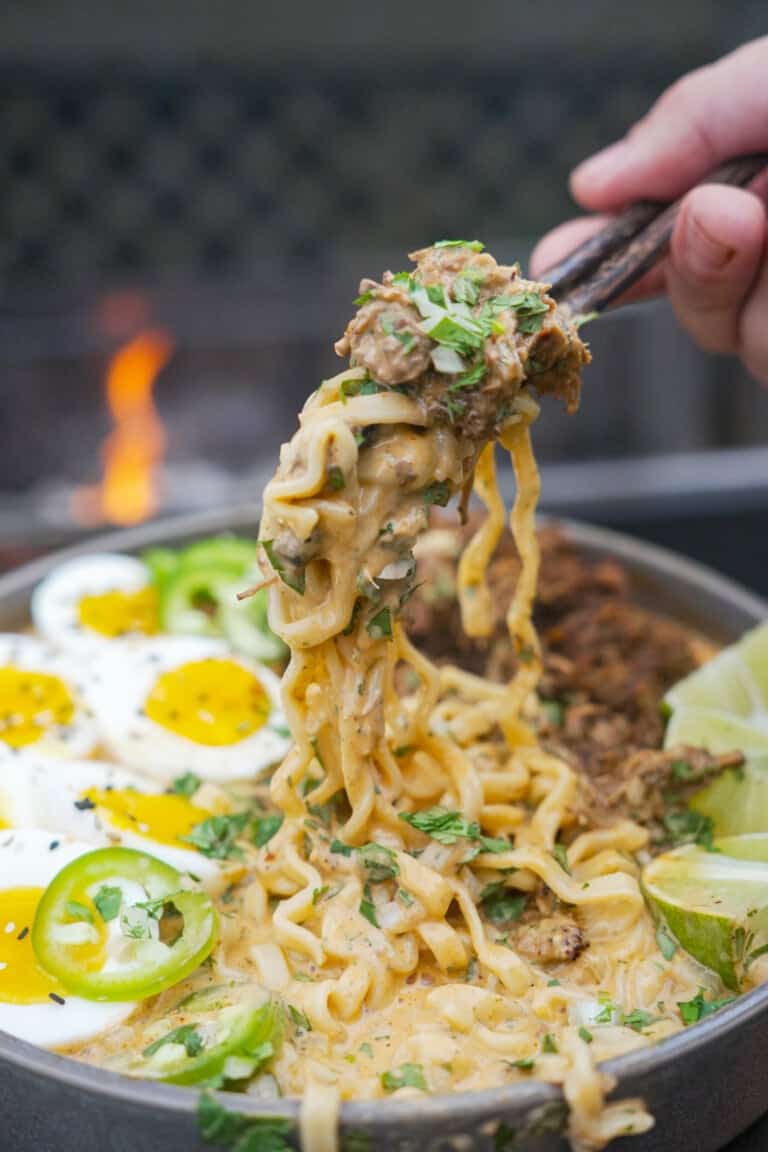
Ramen is such a versatile, satisfying dish. All those noodles and toppings and freakin’ delicious broth? Can’t go wrong. I…
The post Surf and Turf Ramen appeared first on Over The Fire Cooking.
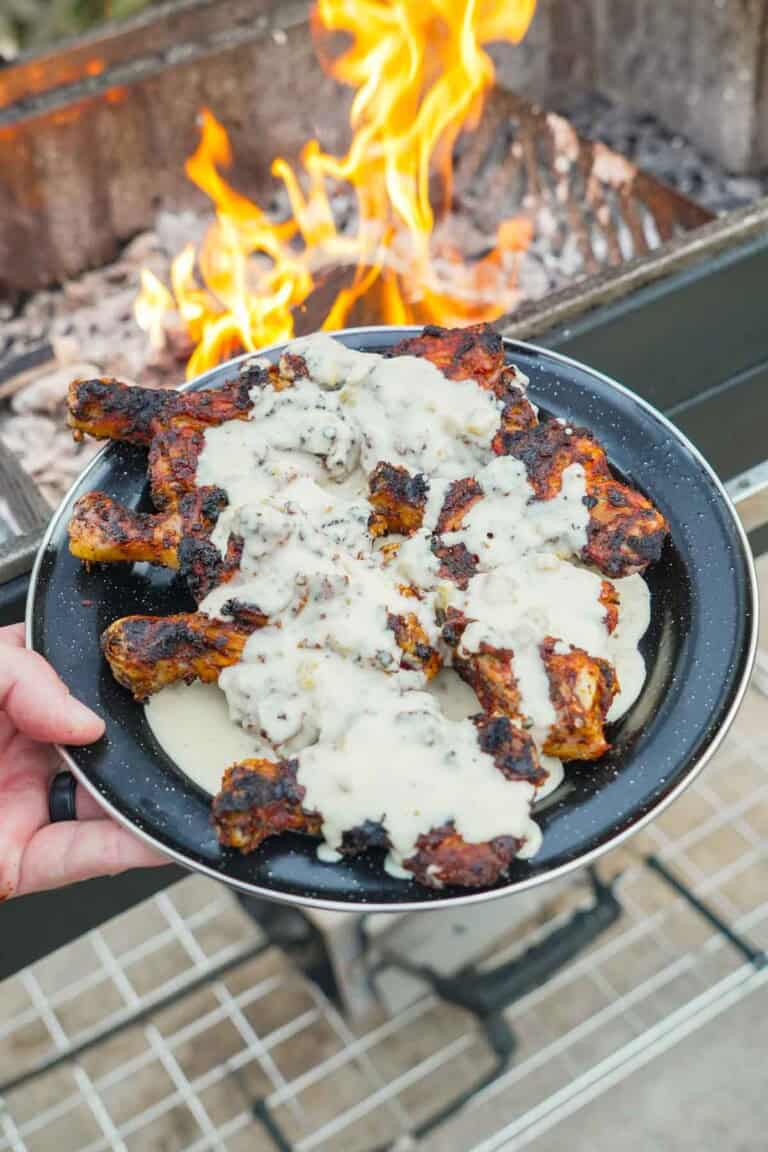
Grilled Butterflied Chicken Drumsticks with Queso are my kind of backyard classic. A bigger surface area for the chicken means…
The post Grilled Butterflied Chicken Drumsticks with Queso appeared first on Over The Fire Cooking.
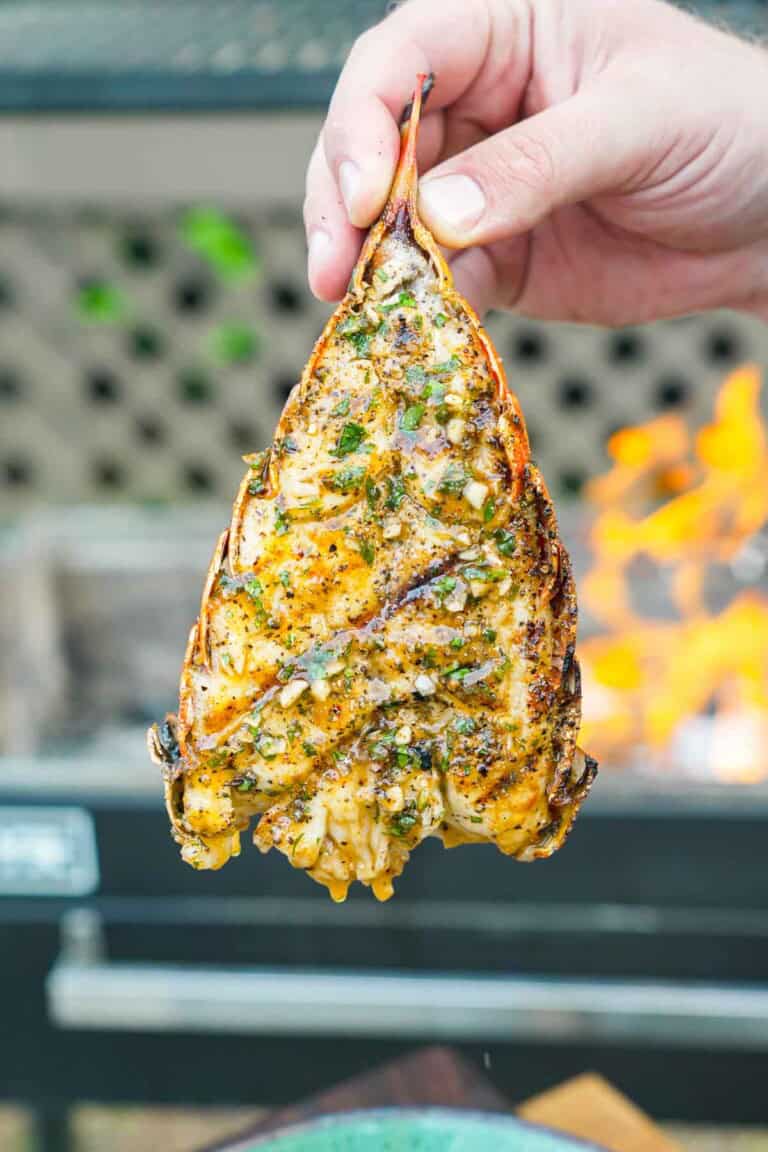
I make this grilled lobster tail recipe as one of my regular monthly cooks because of how much I love…
The post Grilled Lobster Tails with Honey Cajun Butter appeared first on Over The Fire Cooking.

Welcome to my Grilled Fish Roundup! Nothing beats the moment when freshly caught seafood hits the grill, with the crackle…
The post Grilled Fish Recipes appeared first on Over The Fire Cooking.
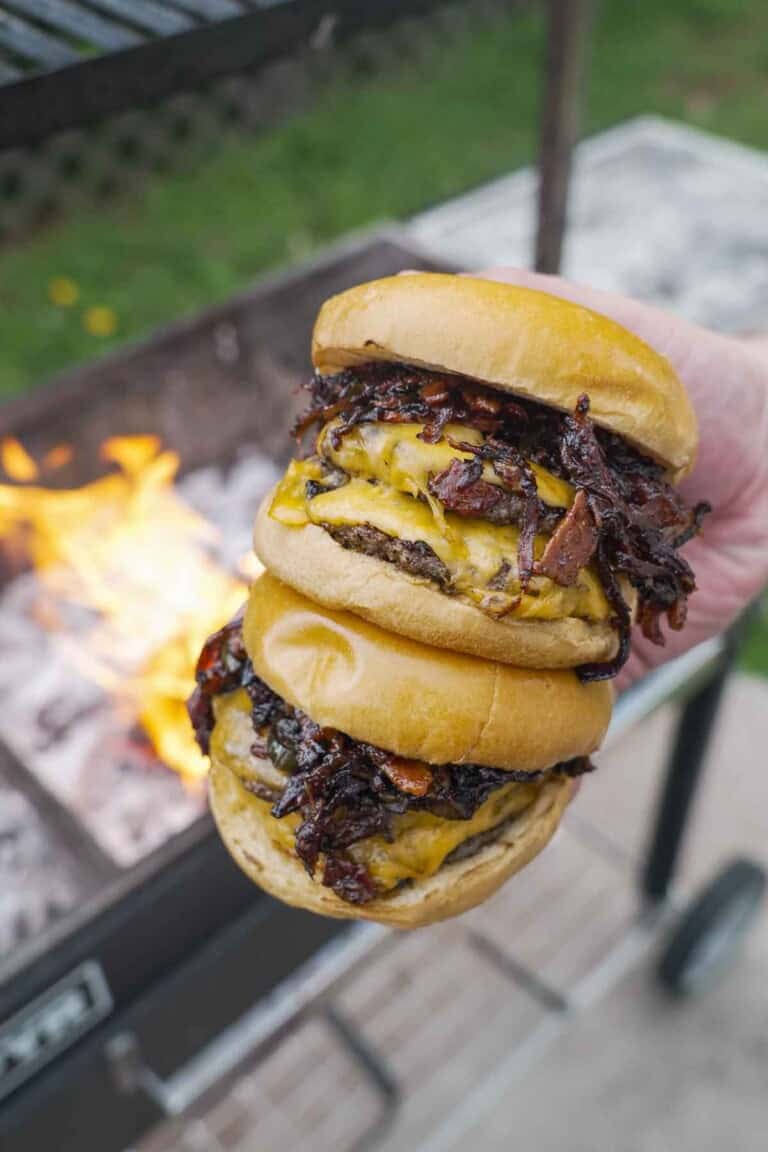
If you’re looking for a great burger, Bacon Jam Burgers with jalapenos are ready to take your backyard grilling to…
The post Bacon Jam Burgers appeared first on Over The Fire Cooking.
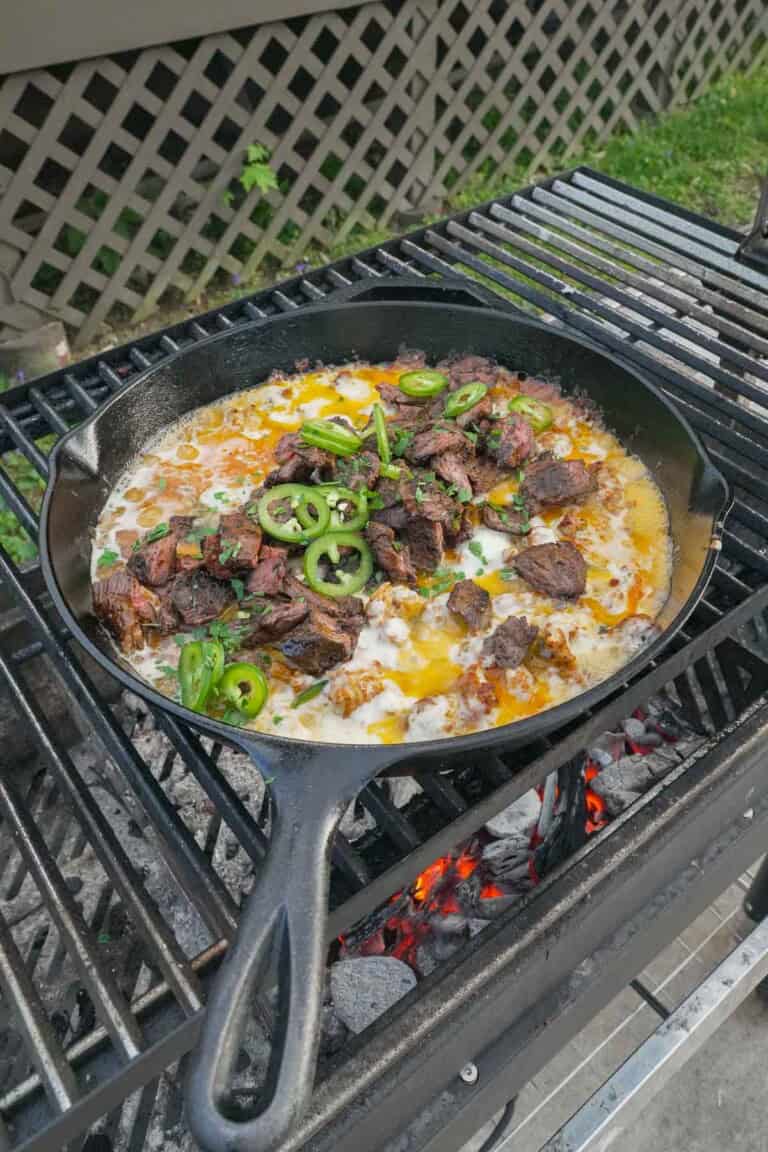
Ah, queso. There is just a certain level of happiness that comes along with a bowl of bubbling, melty cheese…
The post Queso Flameado appeared first on Over The Fire Cooking.
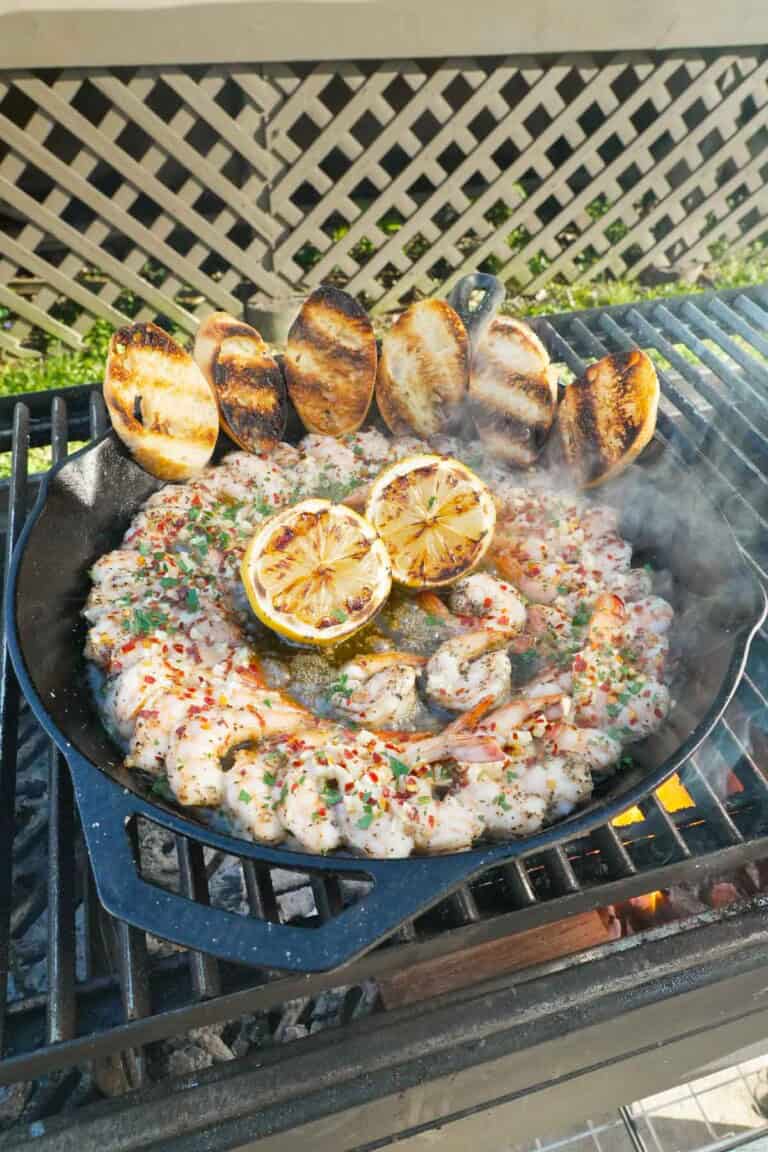
If you’re looking for a quick, easy, freakin’ delicious dinner for tonight, this garlic smoked shrimp recipe is IT. Everything…
The post Smoked Shrimp appeared first on Over The Fire Cooking.
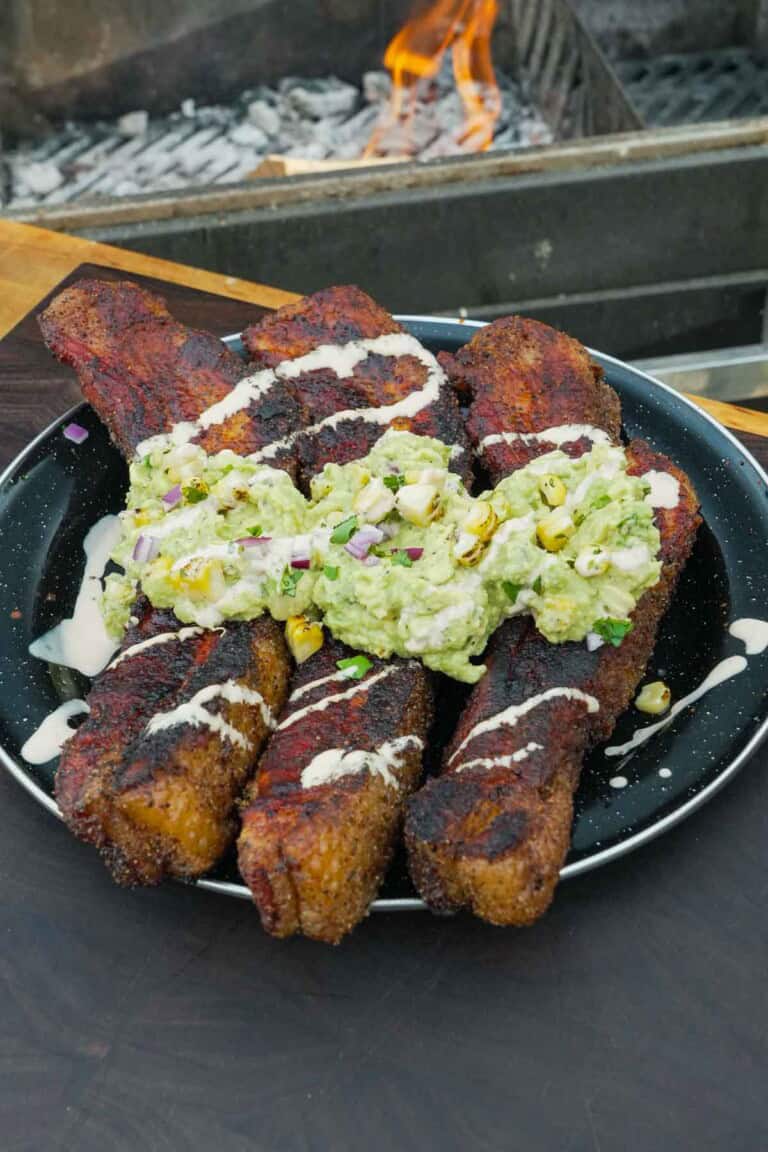
This elote pork belly recipe has got it all. It’s crispy and tender, rich and fresh at the same time,…
The post Elote Pork Belly appeared first on Over The Fire Cooking.
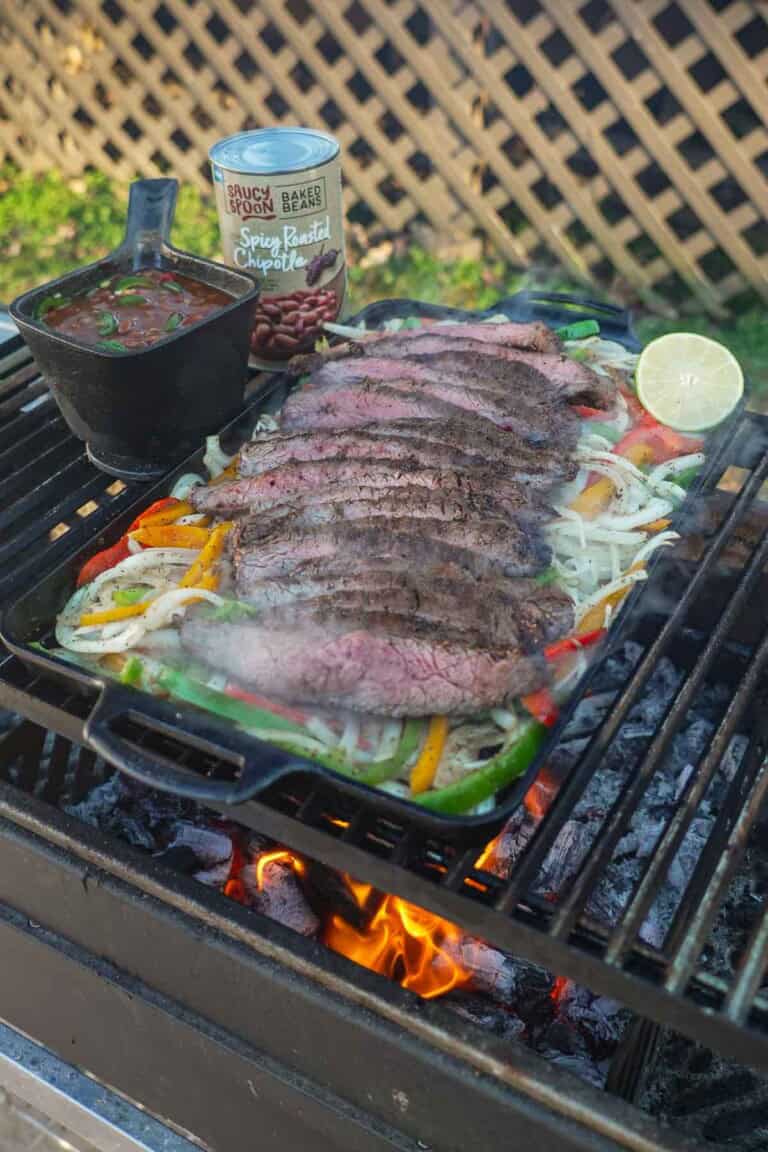
Steak fajitas are easy, fast, meaty and so freakin’ delicious — basically, the perfect dinner. We’re pairing this steak fajitas…
The post Steak Fajitas appeared first on Over The Fire Cooking.
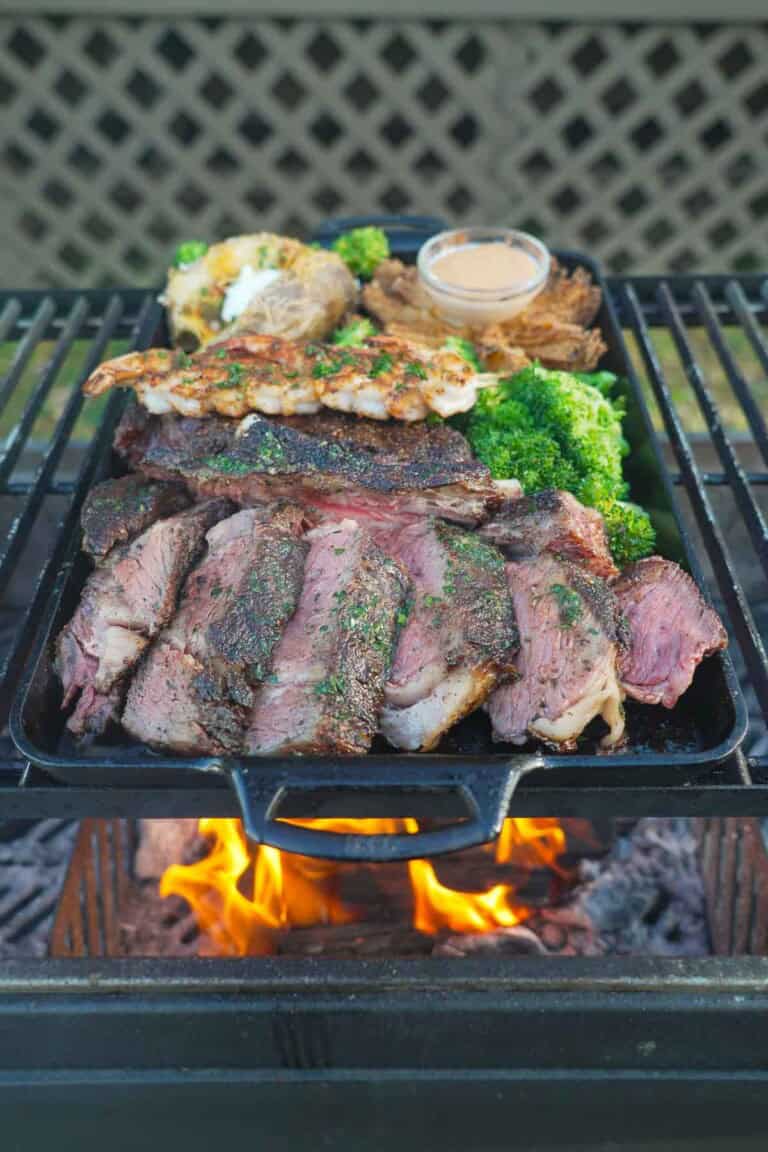
If you’ve ever craved the Outback ribeye but didn’t want to drop some serious coin, I got you. Today, we’re…
The post Outback Ribeye appeared first on Over The Fire Cooking.